This article explores the process of sending a calendar invite directly from the active call page during a dial session. Any events created through this method will synchronize with the calendar associated with your connected email account. Before you use this feature, please make sure that your email is linked to Symbo.
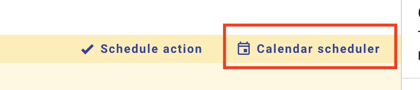
On the active call page, locate and click the button labeled Calendar scheduler in the action bar.
Upon entering, you'll see a day-view calendar displaying your events by default. You can opt to view the availability of other users in your organization by selecting their calendars."
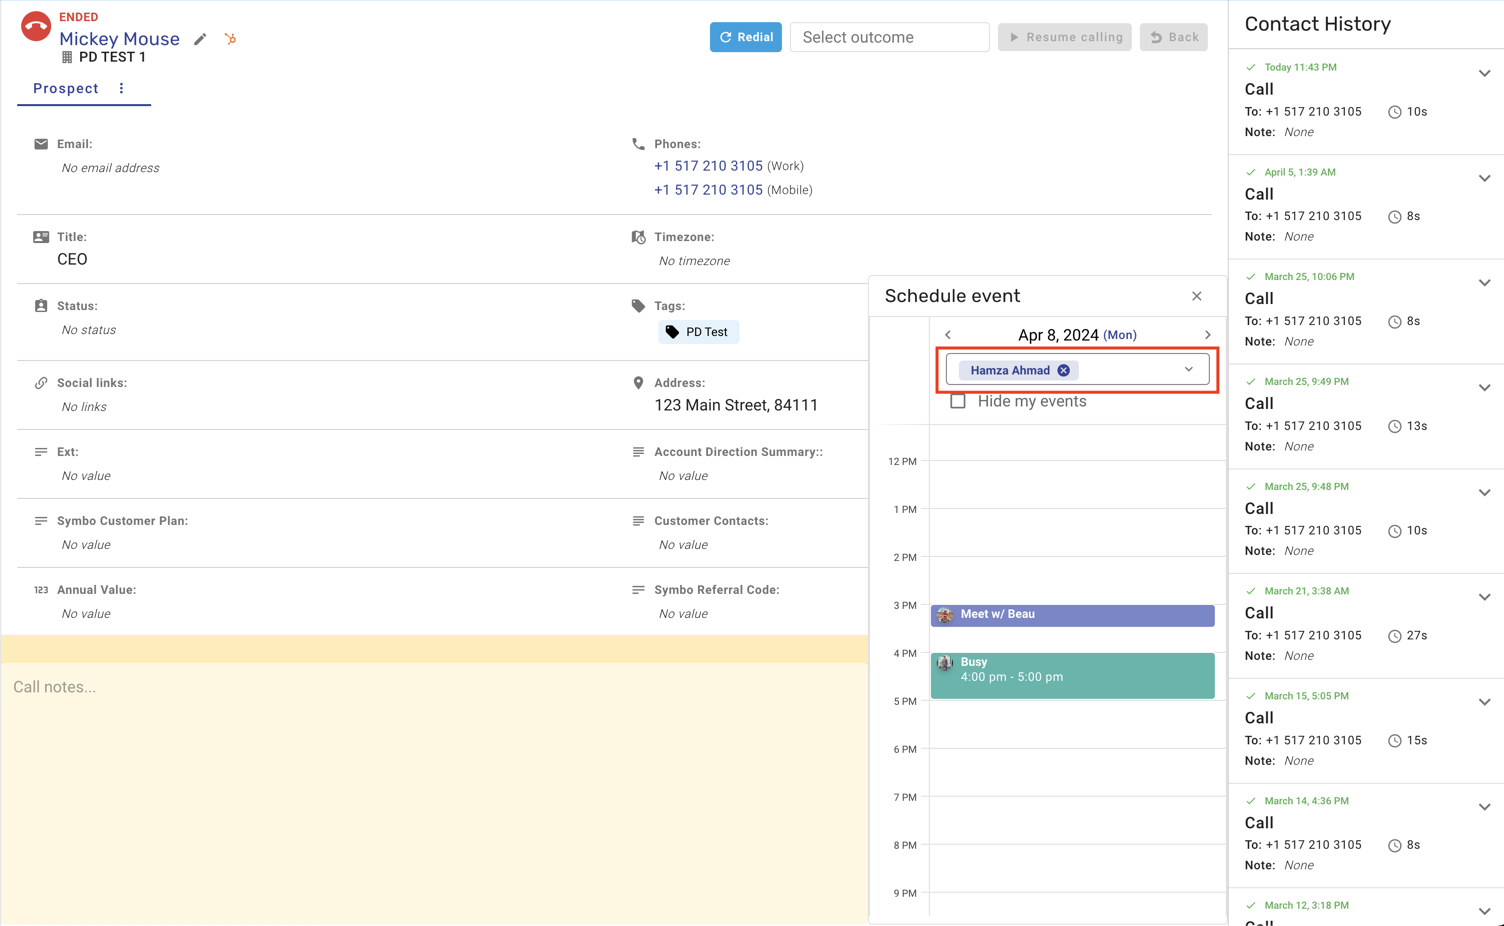
Click on any available slot on the calendar scheduler to open an event creation dialog. Here, you can invite other team members, prospects, or anyone else via email.
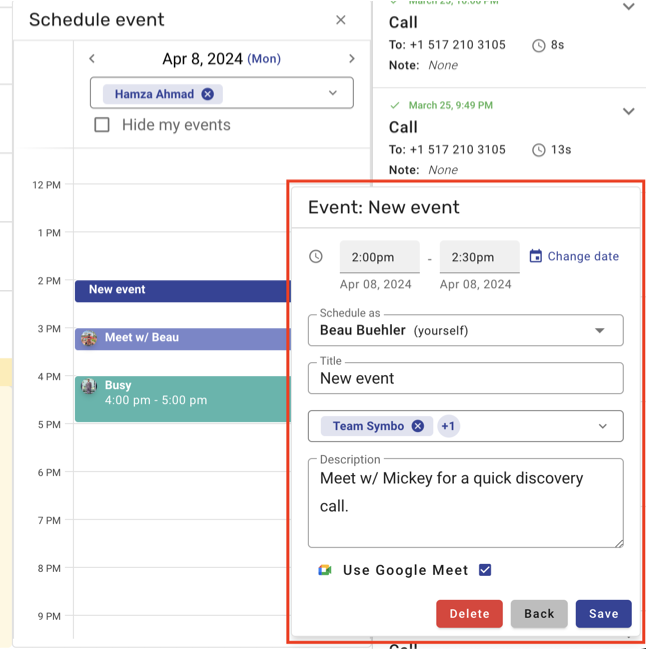
In this dialog, you can:
Specify the date & time for your calendar event
Schedule the event on behalf of another user in your organization (if permission is granted)
Add a title and description for the event
Include a Google Meet link in the calendar event (if integrated with Gmail)
After saving your meeting, the following will occur:
The event will be added to your calendar or to the calendar of the person you have selected to schedule with.
Calendar event emails will be sent to the guests.
If selected, a Google Meet link will be incorporated into the event.
If you need to make changes to an event or remove it from your calendar, you can easily do so by following these steps.
To begin, navigate to the scheduler view by clicking on the "Calendar scheduler" button in the active call page actions bar. This will bring up a day view of all your scheduled events.
Once you are in the calendar view, locate the event you wish to edit or delete. Once you have found the event, click on it to select it. Note: If you are not the organizer of the event, you may not have permission to edit or delete it.
If you have edit access to the event, a dialog box will appear with the event details. From here, you can make any necessary changes to the event, such as the date, time, or description. If you wish to delete the event, simply click on the "Delete" button at the bottom of the dialog box. Note: If you do not have edit access, the dialog box will not appear and you will not be able to make any changes to the event.
Once you have made your desired changes, be sure to click on the "Save" button at the bottom of the dialog box. This will update the event on your calendar. Note: If you have deleted the event, it will be removed from your calendar immediately.
You now know how to create, edit, or delete an event on your calendar. If you have any further questions or need assistance, please don't hesitate to contact our support team for help via chat or at [email protected].
