The Calendar Scheduler functions like Calendly, and it syncs with your calendar when you connect your email. This guide will cover how to create a calendar scheduling page, specify booking flows, set up reminders, and even add custom fields.
Click on your initials at the top right corner of the page, then select "My Settings."
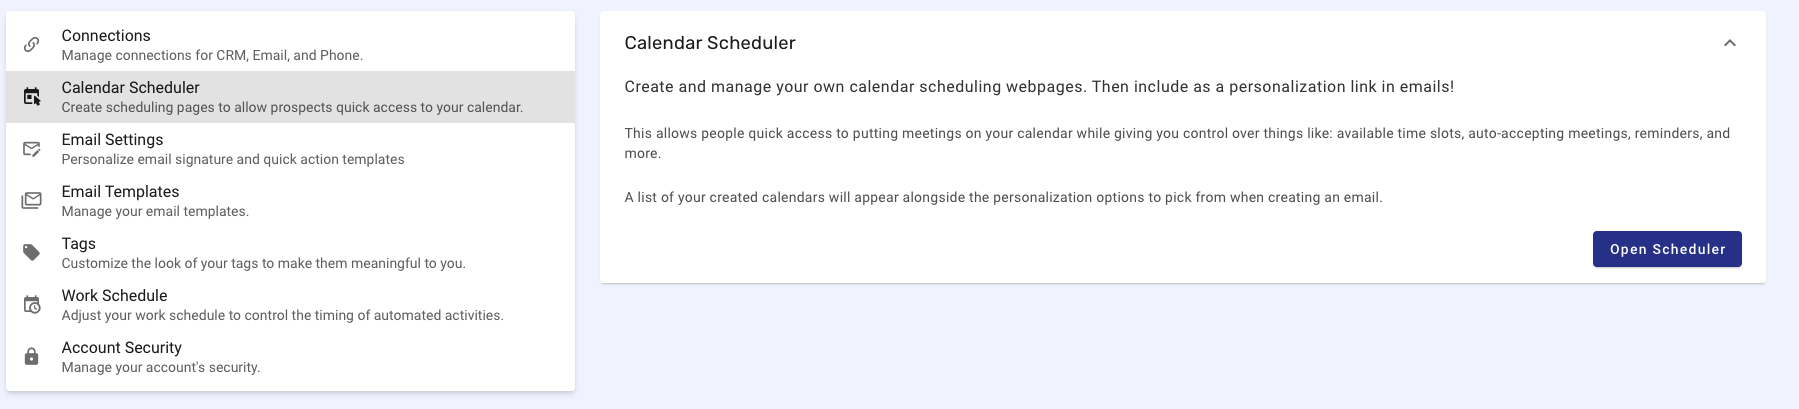
Click on "Calendar Scheduler."
Open the "Calendar Scheduler" field and click "Open Scheduler."
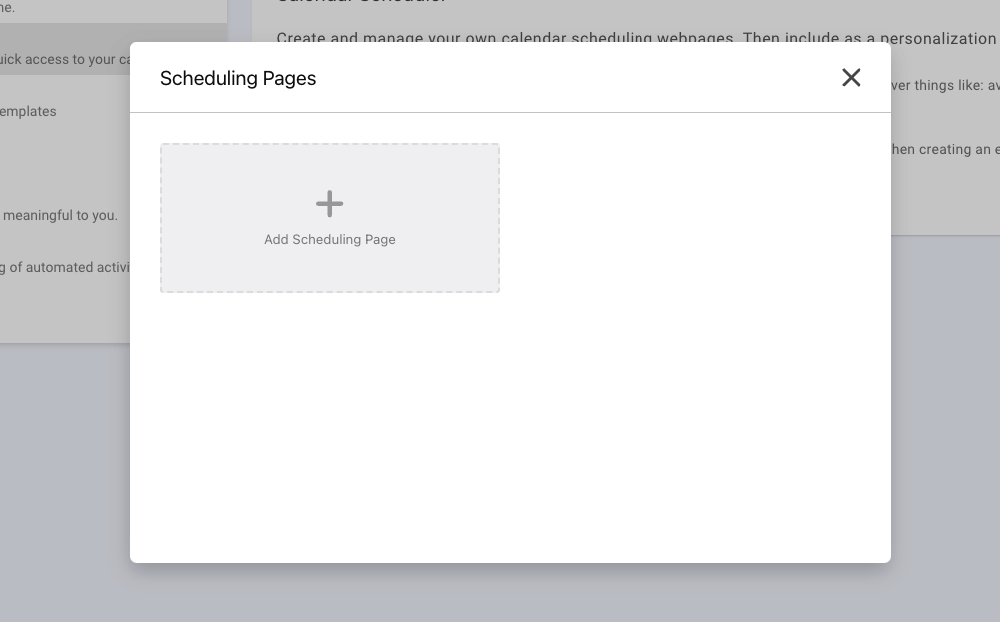
Click "Add a Scheduling Page" and follow the steps to create your calendar schedule or page.
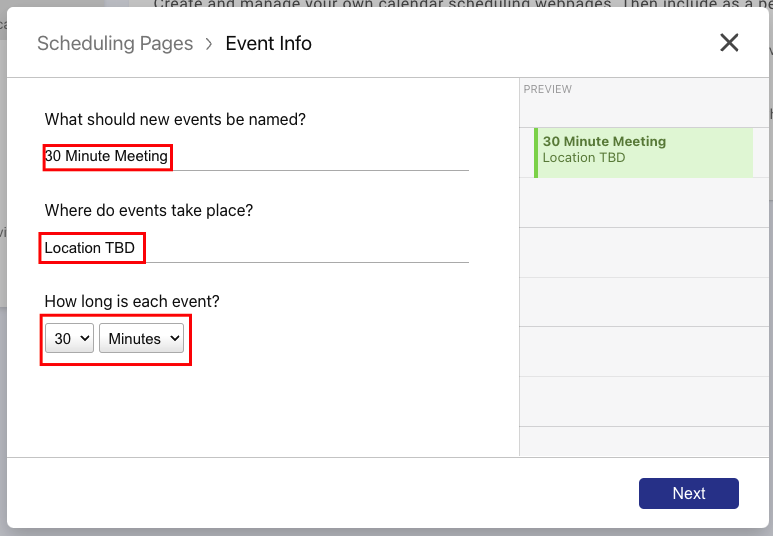
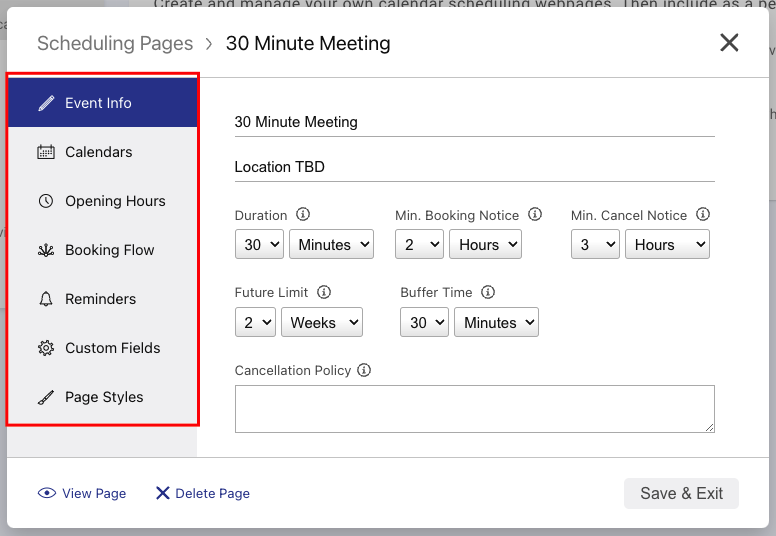
Give your meeting event a name and specify the location of where events will take place (e.g., Zoom, Google Meets, Teams) & Decide how long each event will be.
Next, specify specific booking times throughout the week. EX: if you don't work Monday's this is where you can block those times off.
Define how far in the future events can be booked. For sales purposes, it's recommended to keep this at two weeks to avoid the likelihood of prospects forgetting.
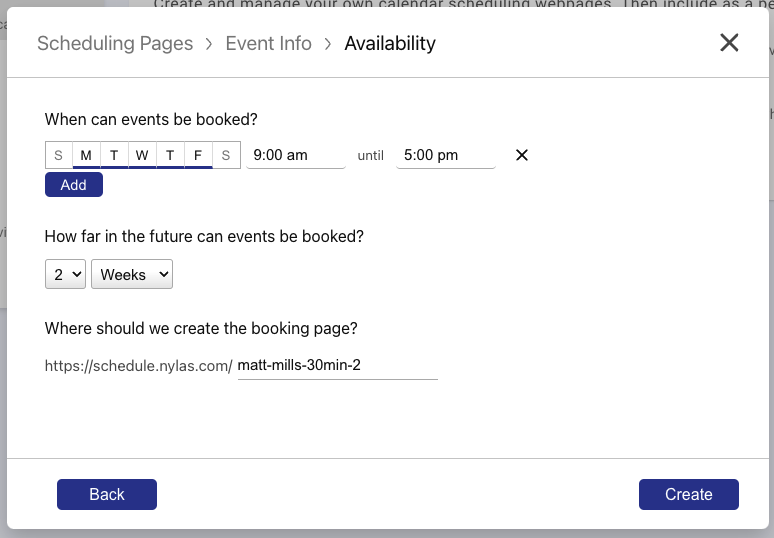
Click "Create."
Once you've created your page, you can go back and edit it further.
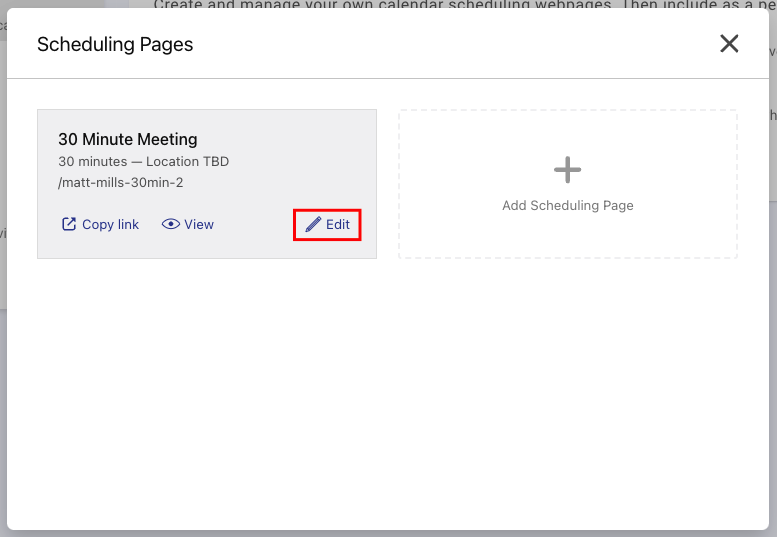
Specify booking flows, set up reminders, and add custom fields in the left hand menu.
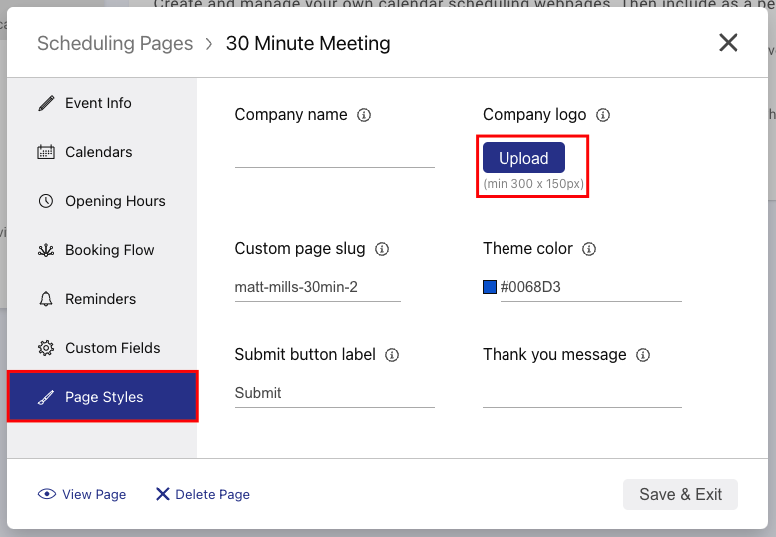
Upload your company logo to the page to have a branded calendar. Go to "Page Styles" and upload your logo.
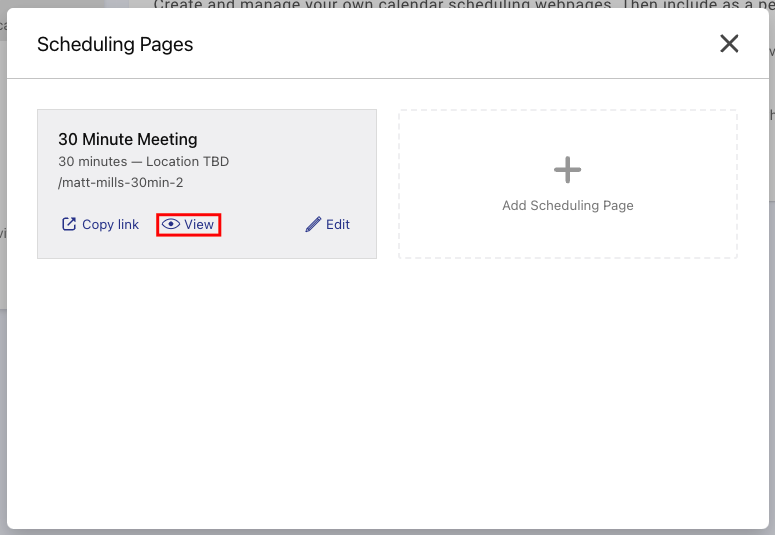
Save and exit, then click "View" to see your prospect-facing calendar. Your company logo will be at the top right corner of the page.
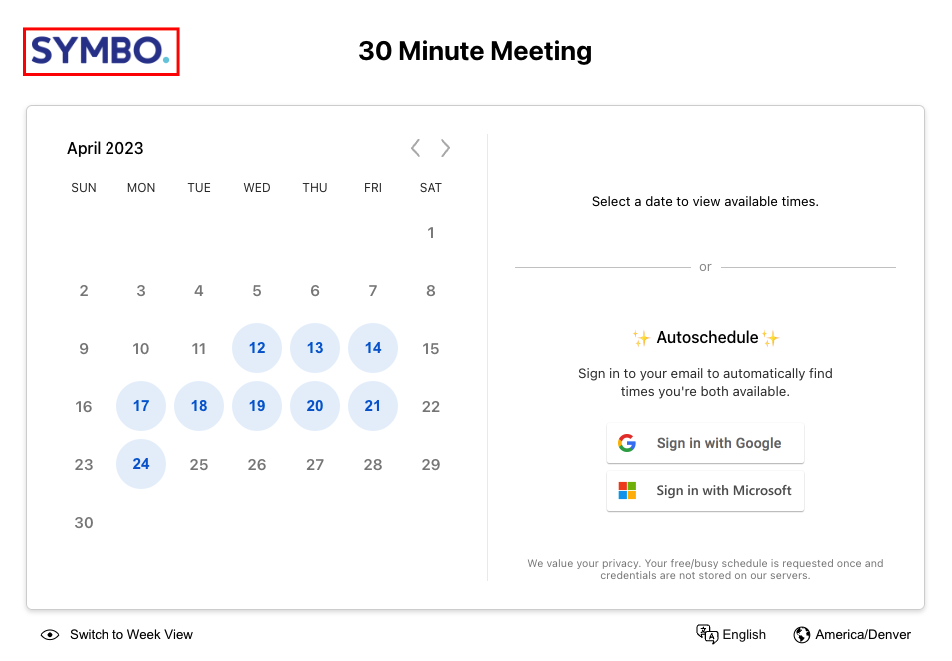
Your availability will show up, and if you have meetings throughout the day, those time slots will automatically be blocked off so you don't get double booked.
Once a prospect selects a time that works best for them, they confirm and fill out the appropriate information before clicking "submit." Then you both are sent a confirmation email.
In summary, this guide has provided step-by-step guidance on how to set up a Calendar Scheduler and customize it to suit your needs. If you have any questions or need further assistance, you can reach out to the Symbo team by emailing [email protected] or start a chat with us by clicking on the "?" icon in the top right of your screen.

