Administrator access to Org Settings
Active phone numbers configured in Symbo
Understanding of your organization’s compliance and calling policies
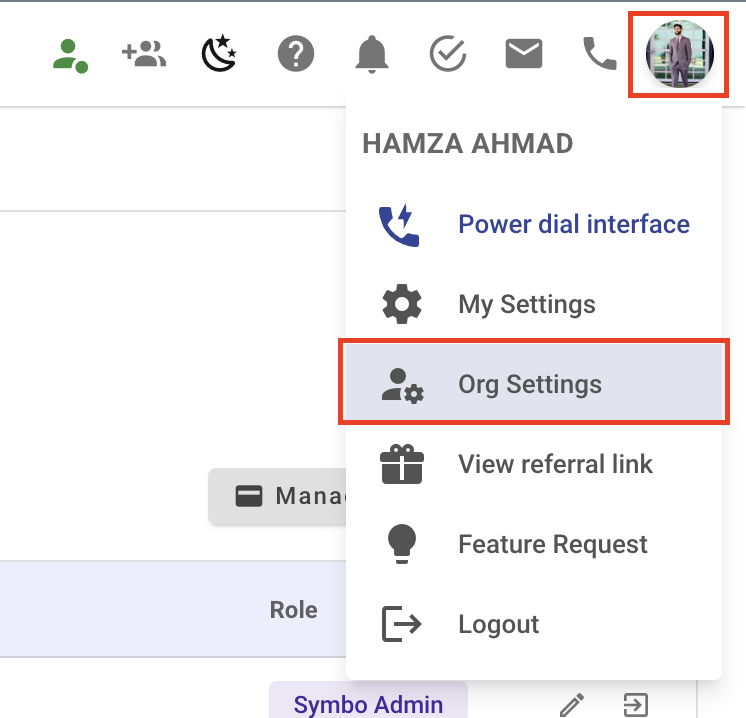
From the Symbo Dashboard click on your Profile Icon/Avatar and select Org Settings
In the settings menu on the left, find the Calling section. The organization-wide dialer controls are split across its pages: General (dialing behavior), Recordings, Team phones, and Call transfers
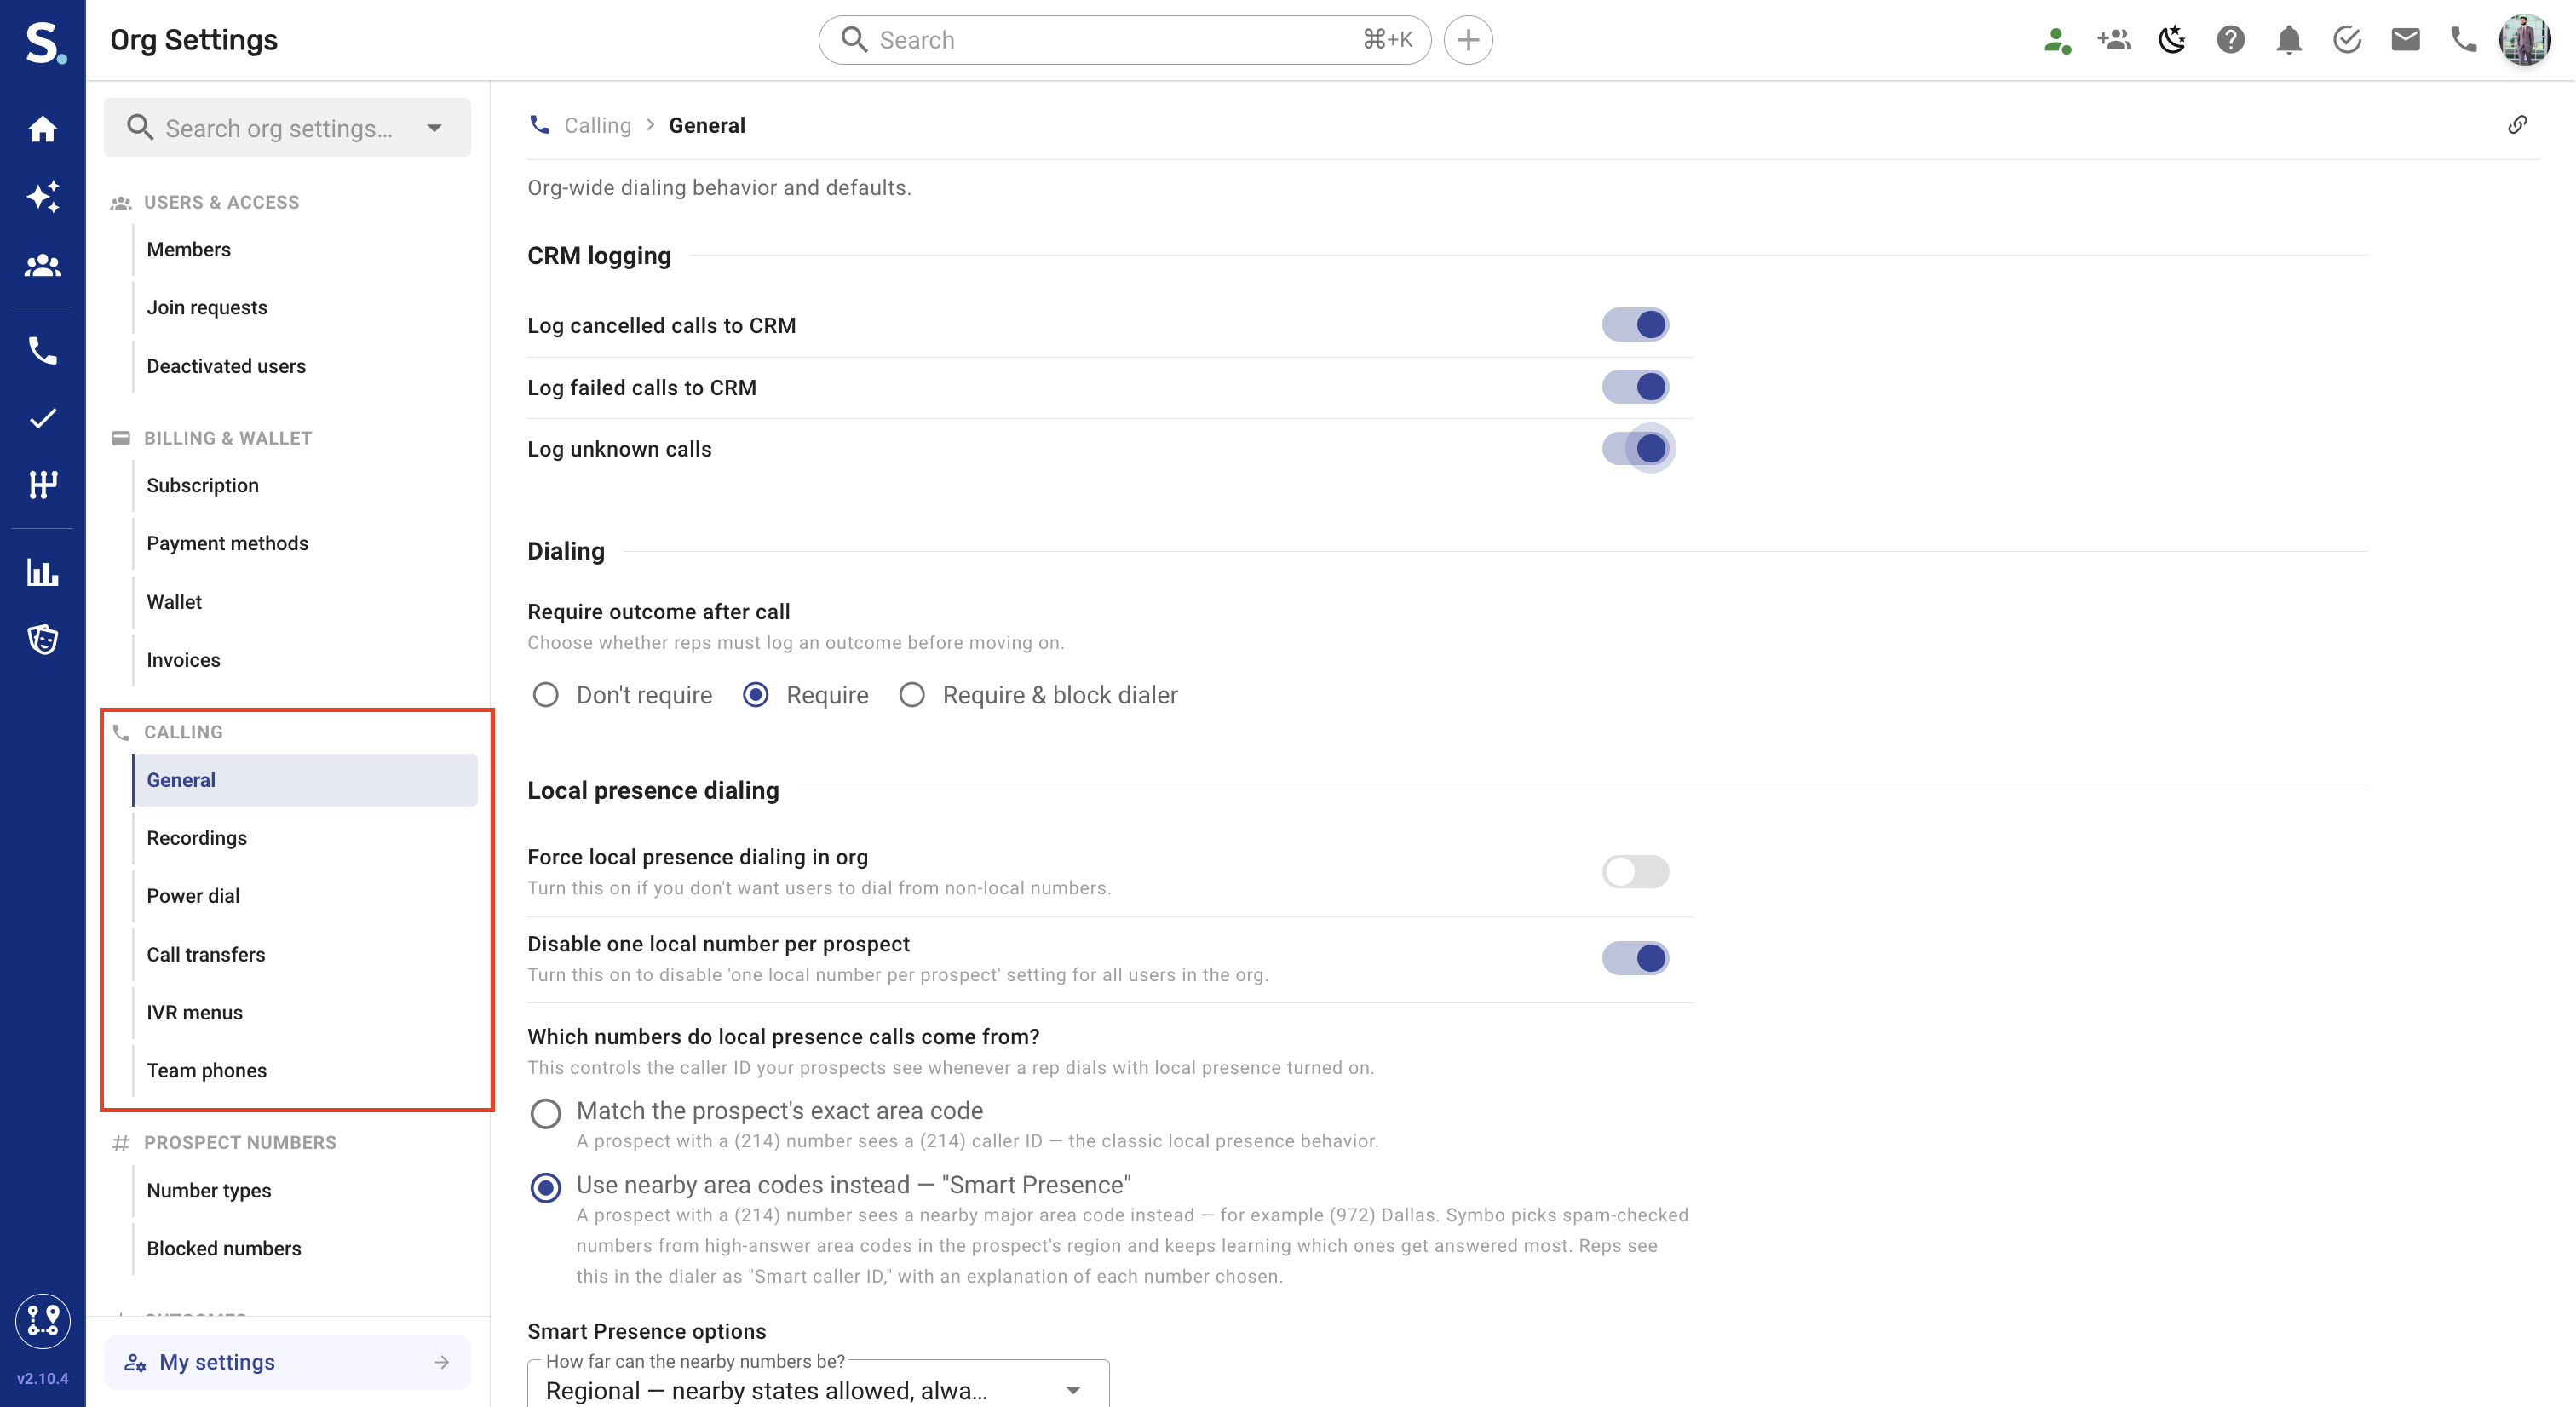
Any changes made here apply to all users in the organization.
Individual users cannot override settings unless explicitly allowed by an admin
Toggles on these pages save automatically as you change them
Local Presence Dialing automatically selects an outbound phone number with an area code that matches (or is close to) the prospect’s location. Displaying a familiar local number significantly improves answer rates and reduces spam labeling
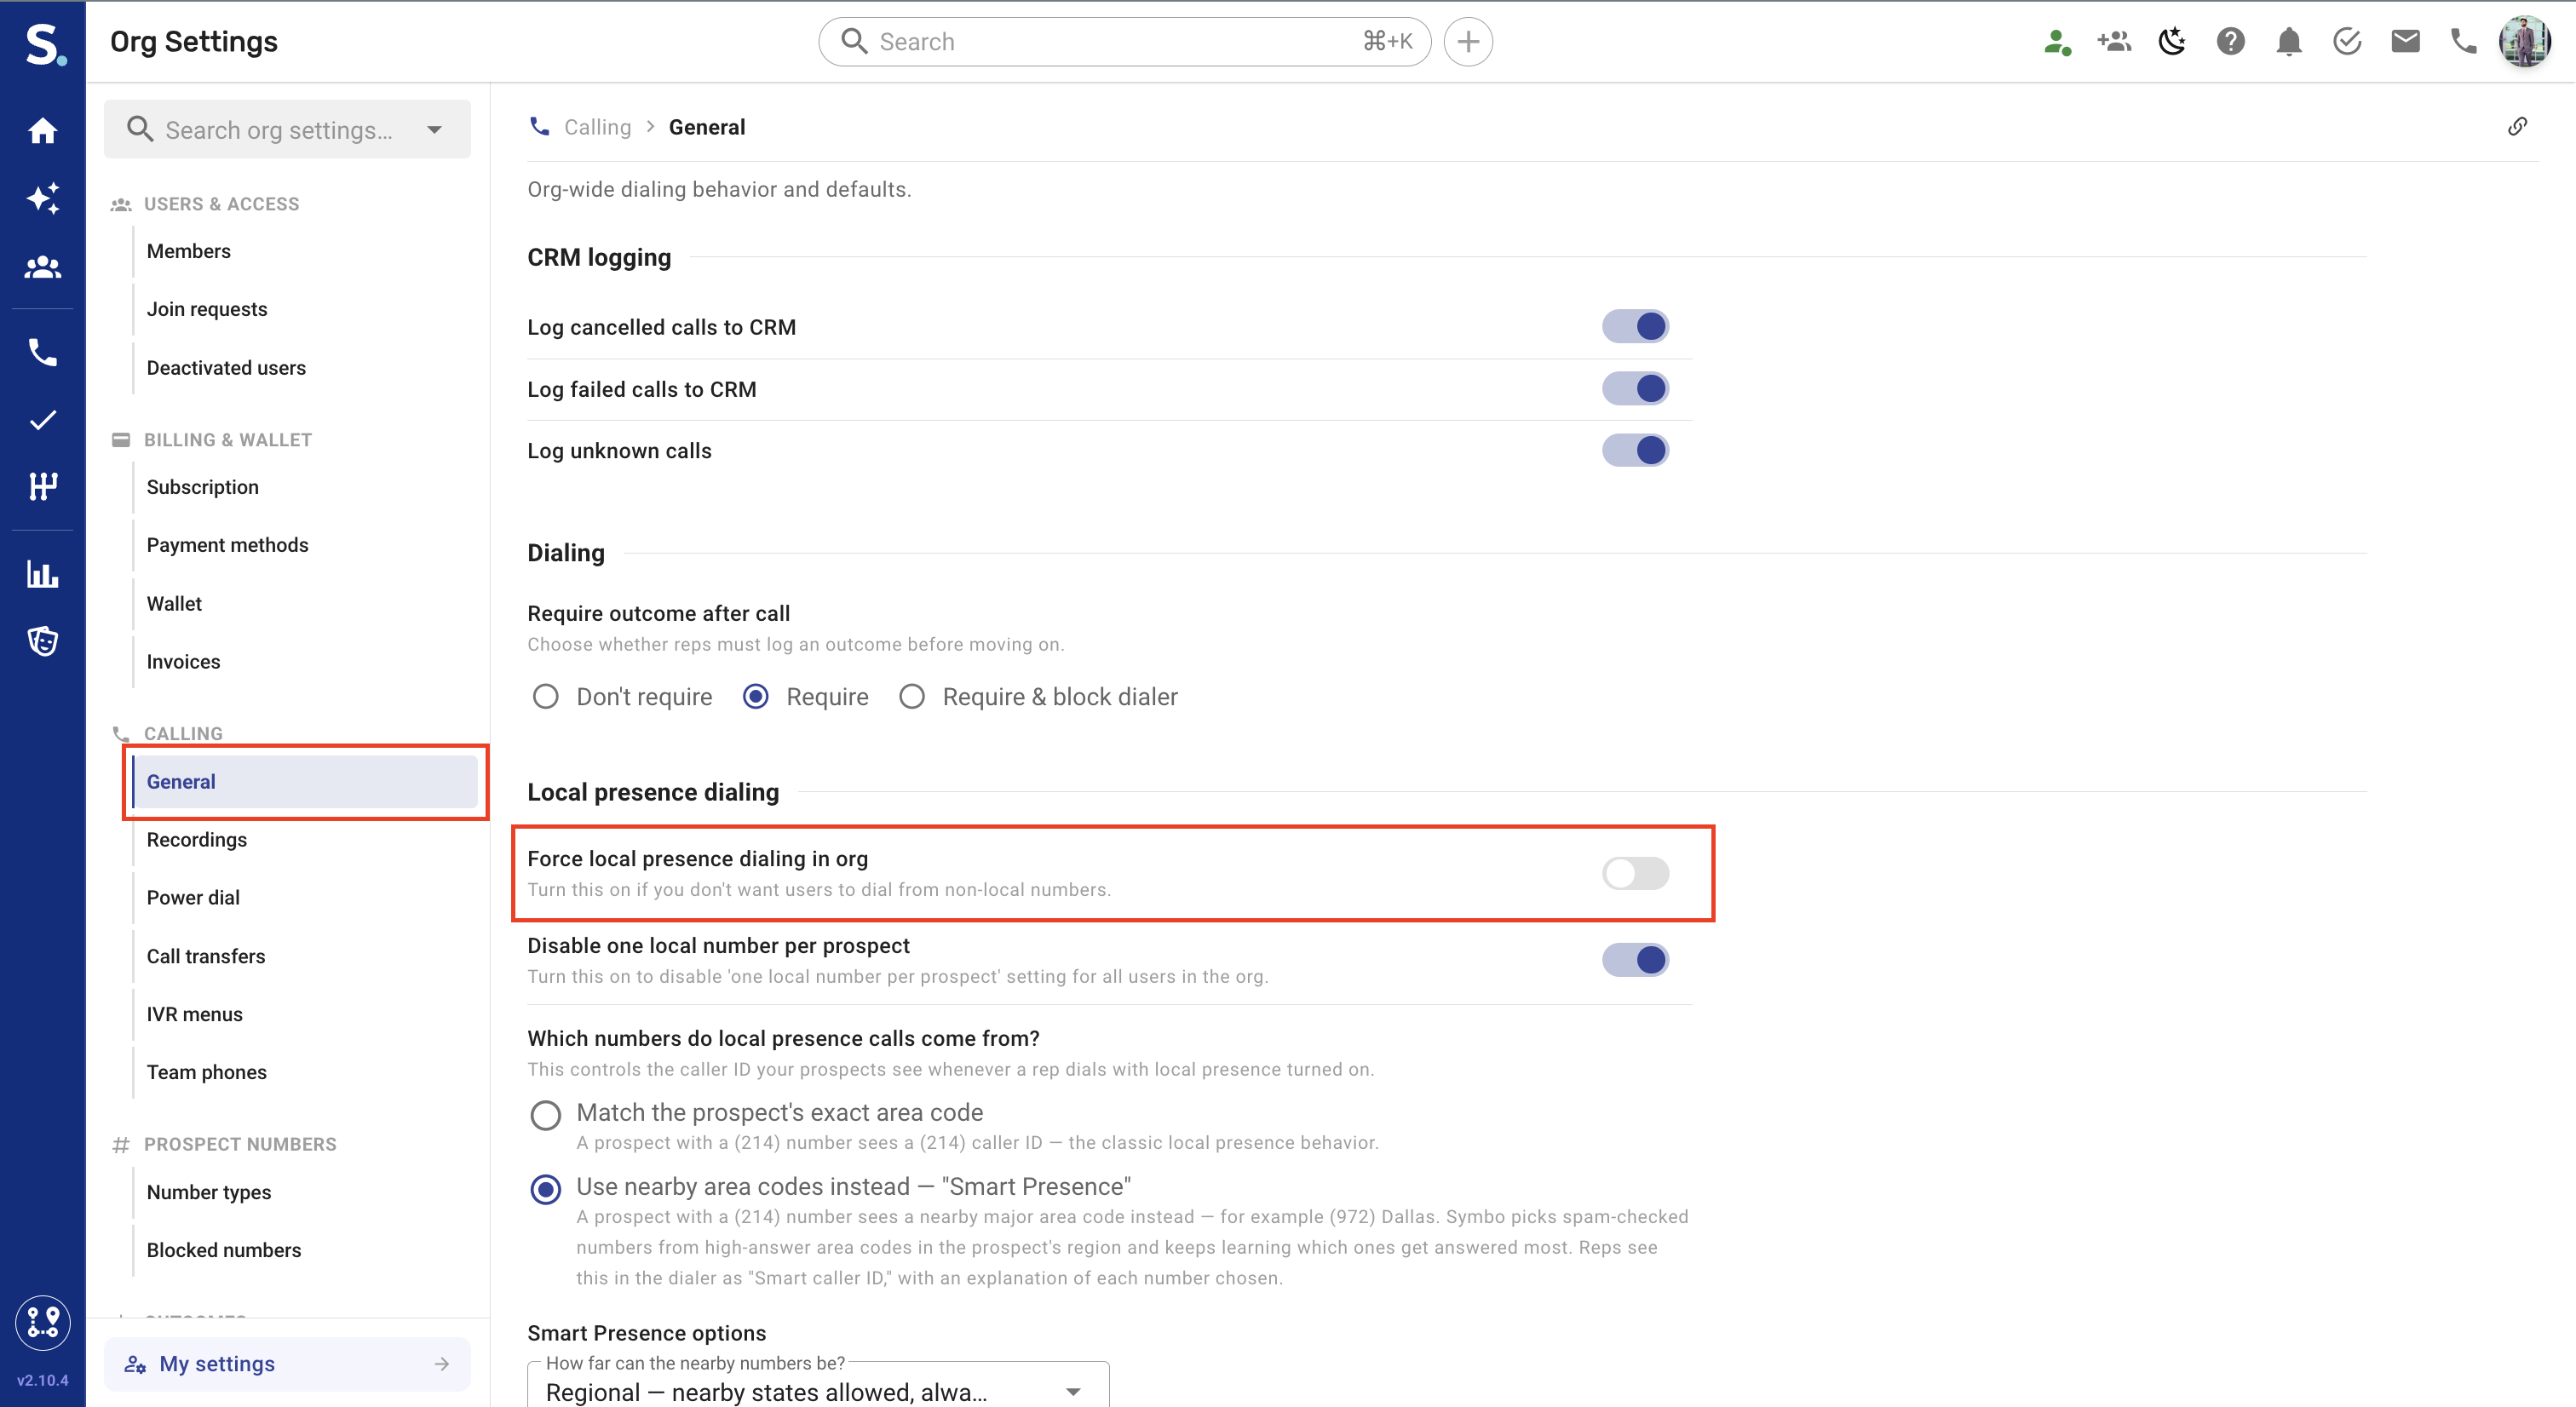
Go to Calling → General and locate the Local presence dialing section.
Turn on Force local presence dialing in org — the change saves automatically.
What happens when this is enabled:
All users are required to use local presence dialing
Users cannot manually select an outbound caller ID
A lock icon appears in the dialer with the message:
“Your org forces local presence”
Manual number selection is completely disabled
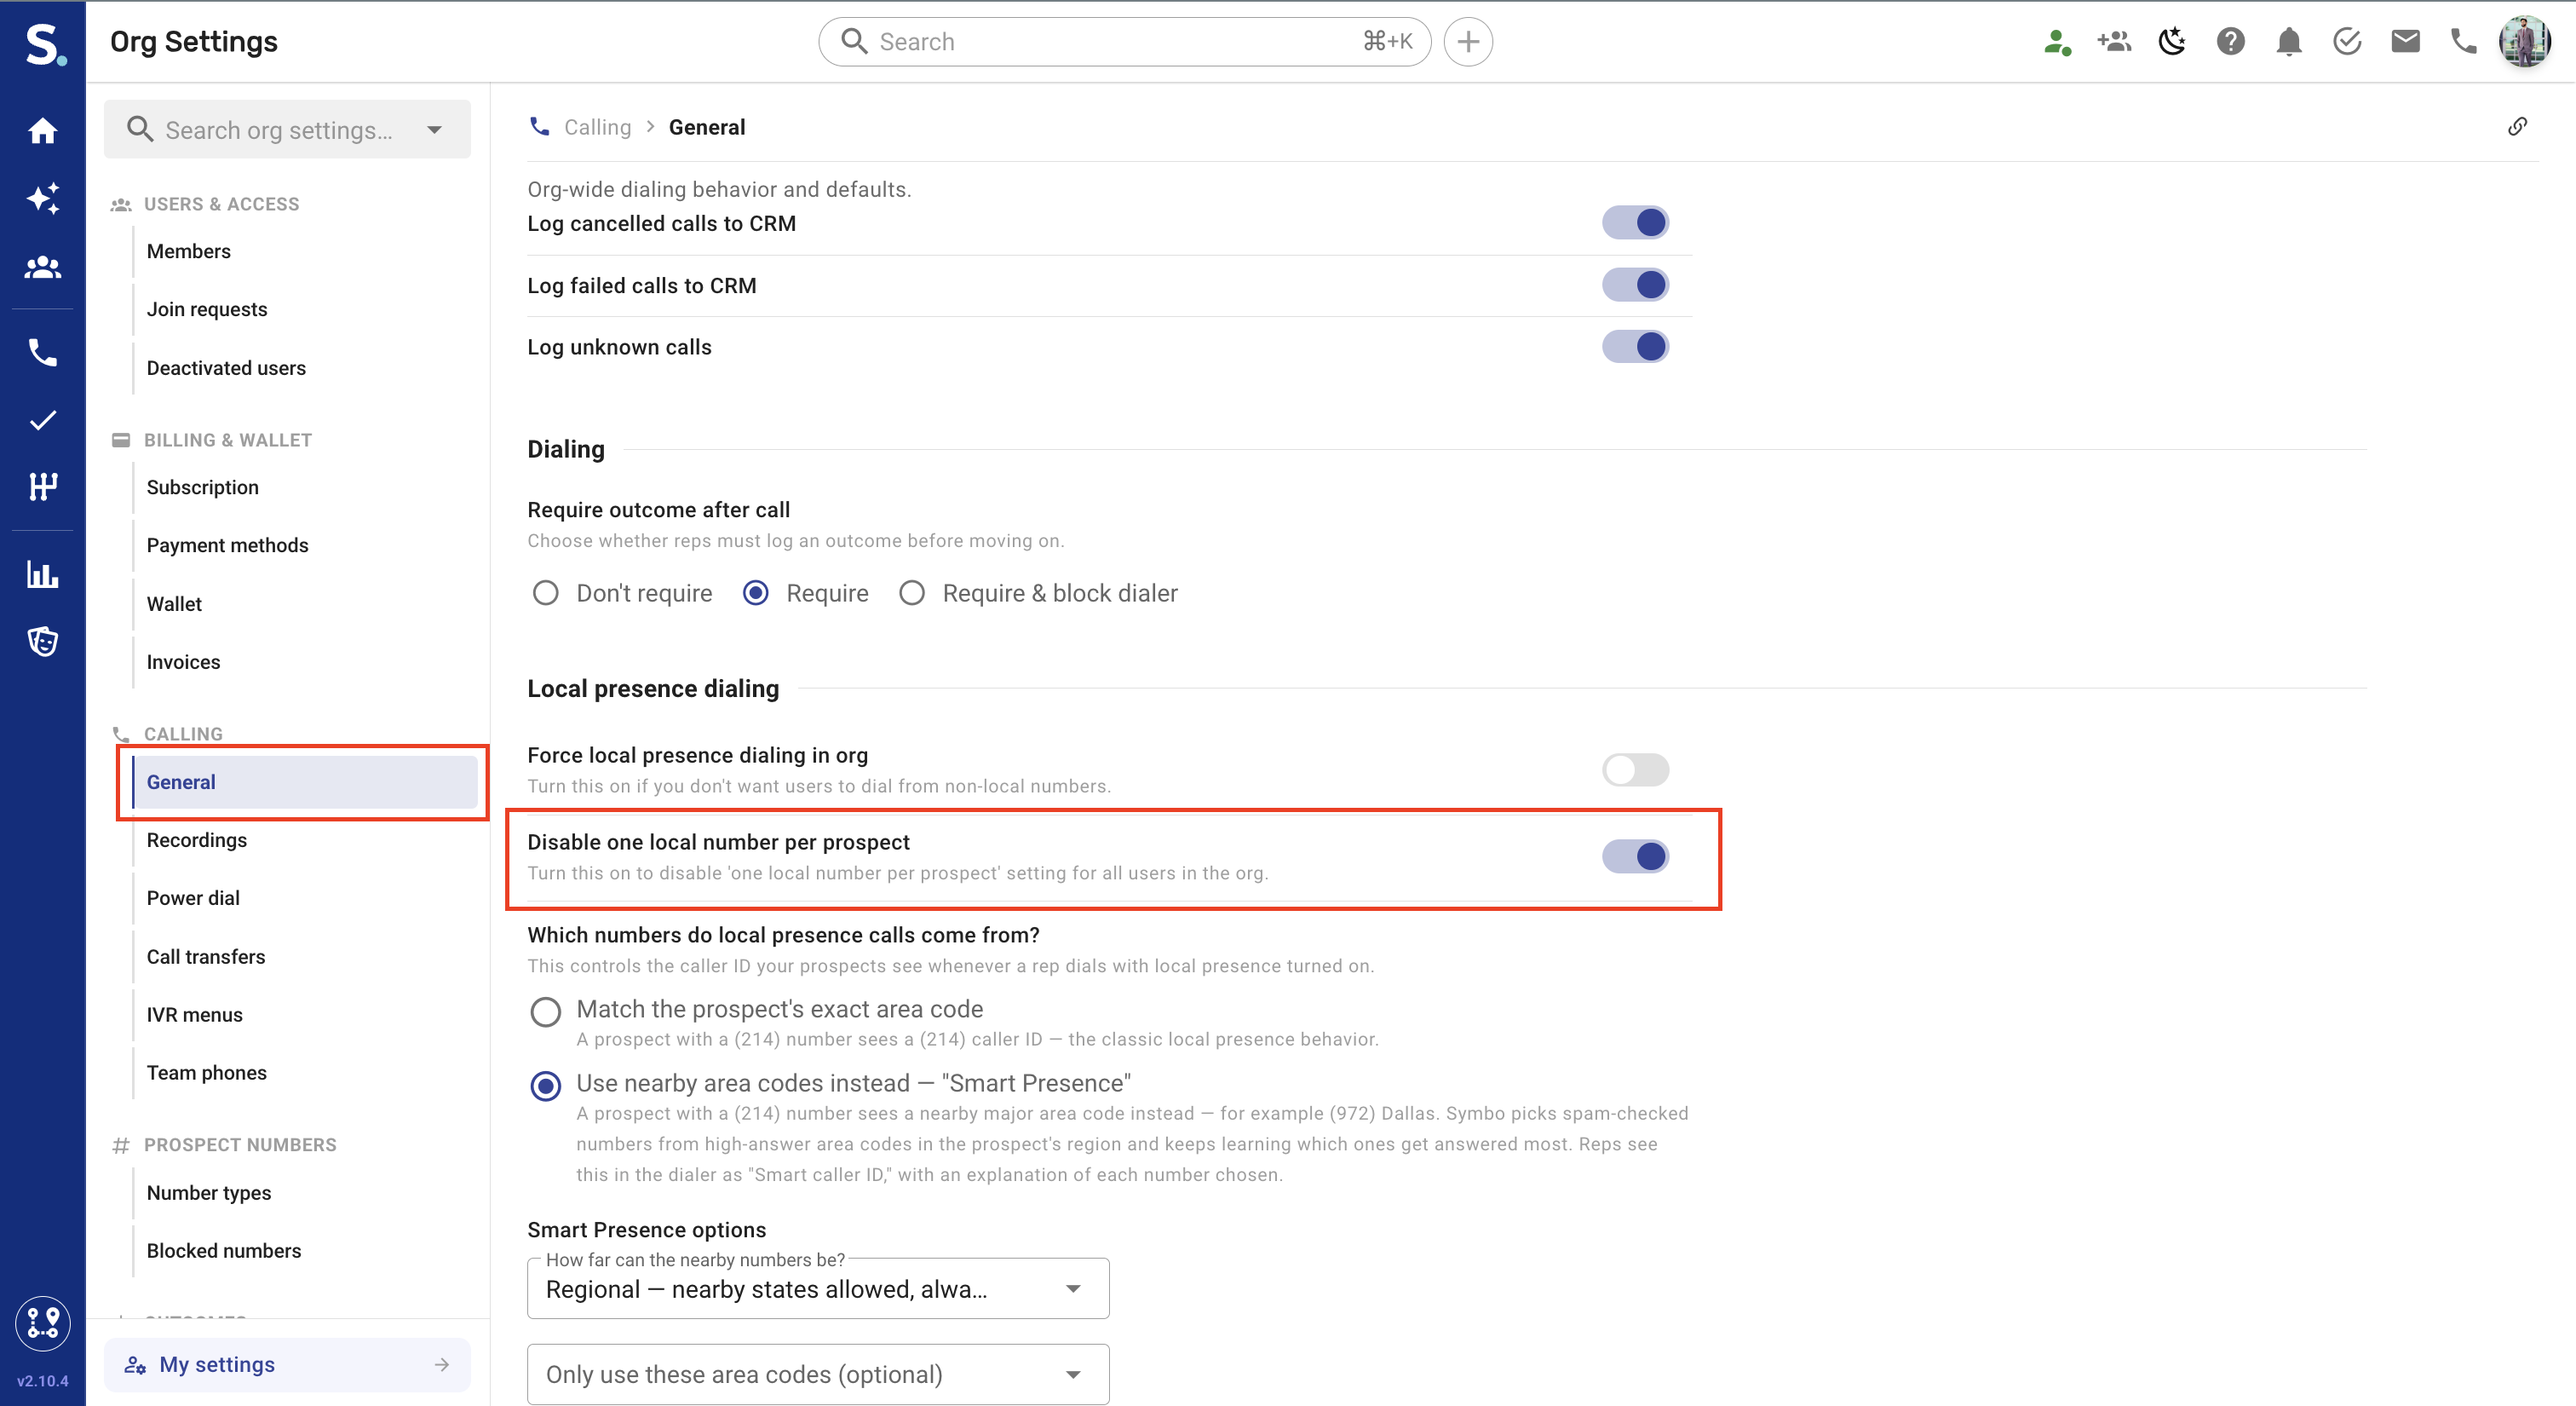
By default, users can choose to keep calling a prospect from the same local number. The Disable one local number per prospect toggle in the same section removes that option for everyone in the org.
What “one local number per prospect” does:
Ensures consistency in the caller ID the prospect sees
Helps build recognition and trust
The system automatically avoids spam-flagged numbers and selects alternatives when needed
When to disable it org-wide:
If your team prefers maximum deliverability over number consistency
If spam-label avoidance is a higher priority than recognition
Recording policies live on Calling → Recordings. The Call recording setting for org control offers three policies:
Records all calls for all users, automatically excluding Do-Not-Record (two-party consent) regions
Best for quality assurance, training, and AI features
DNR regions are pre-populated in the Do-not-record regions section below (e.g., California, Florida) — you can edit the list, and Reset restores the defaults
Each user controls recording for their own calls
Disables all call recording across the organization
Typically used for highly regulated or sensitive environments
Note: Admins can bypass the org setting in the dialer.
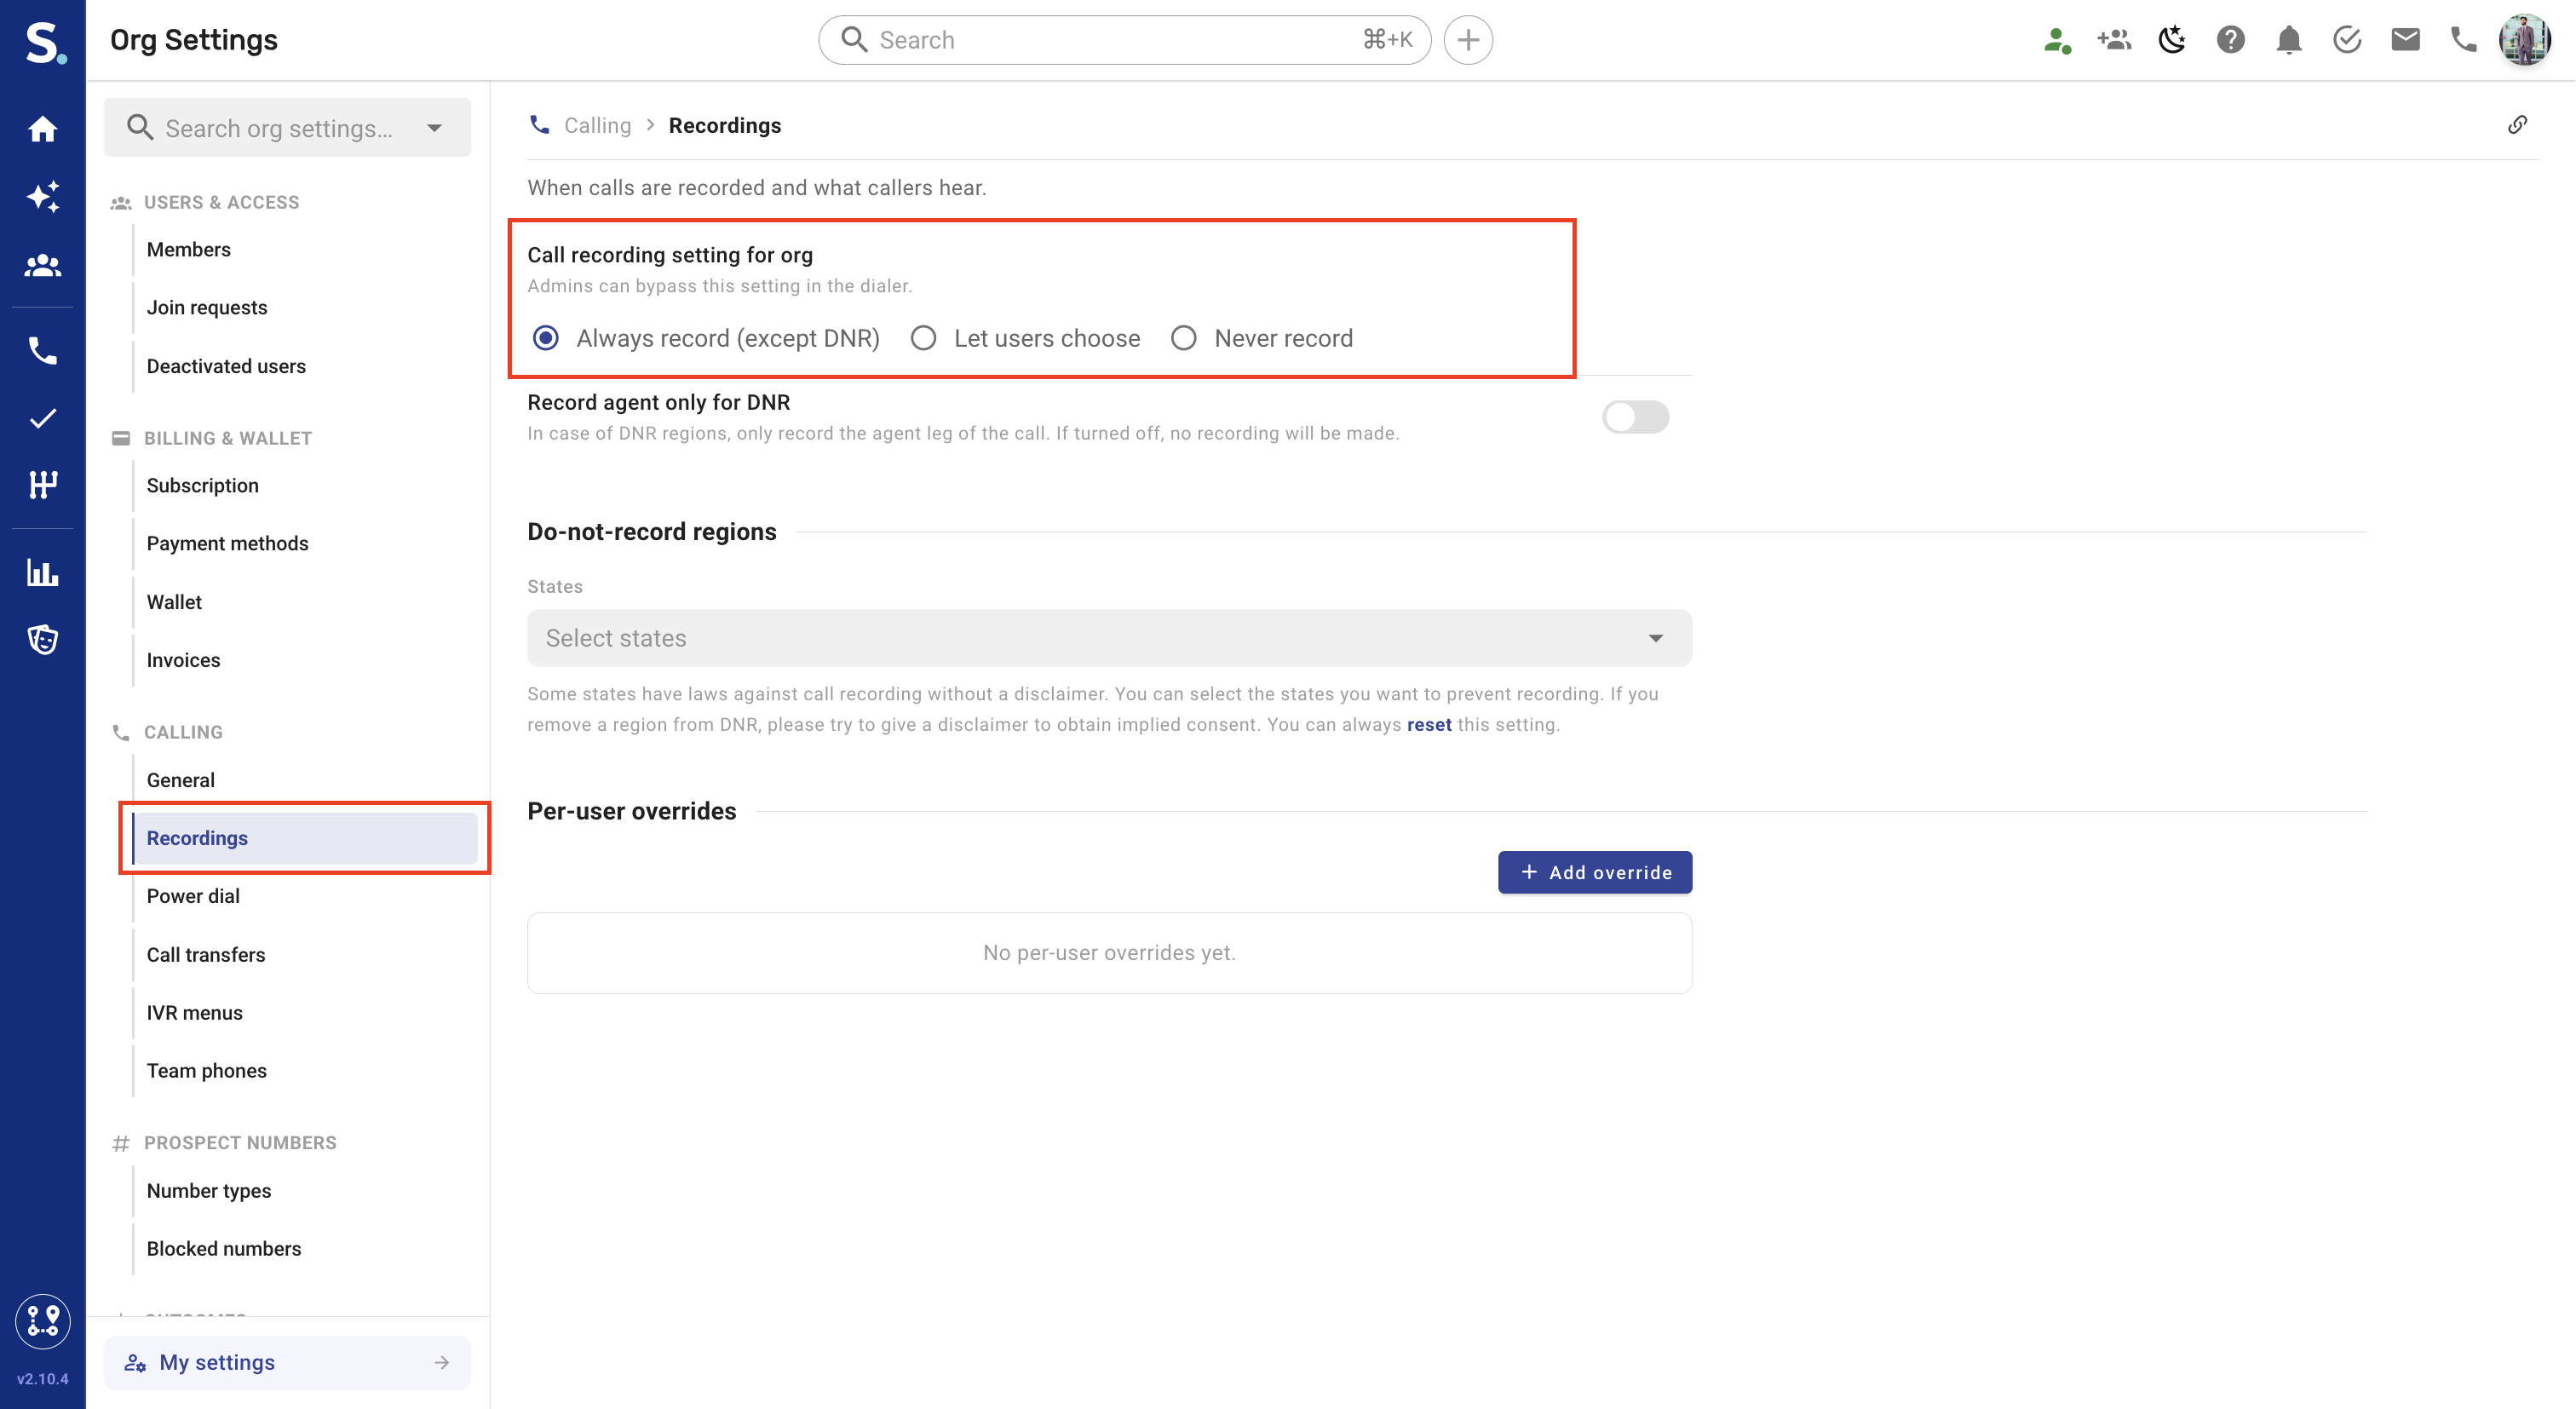
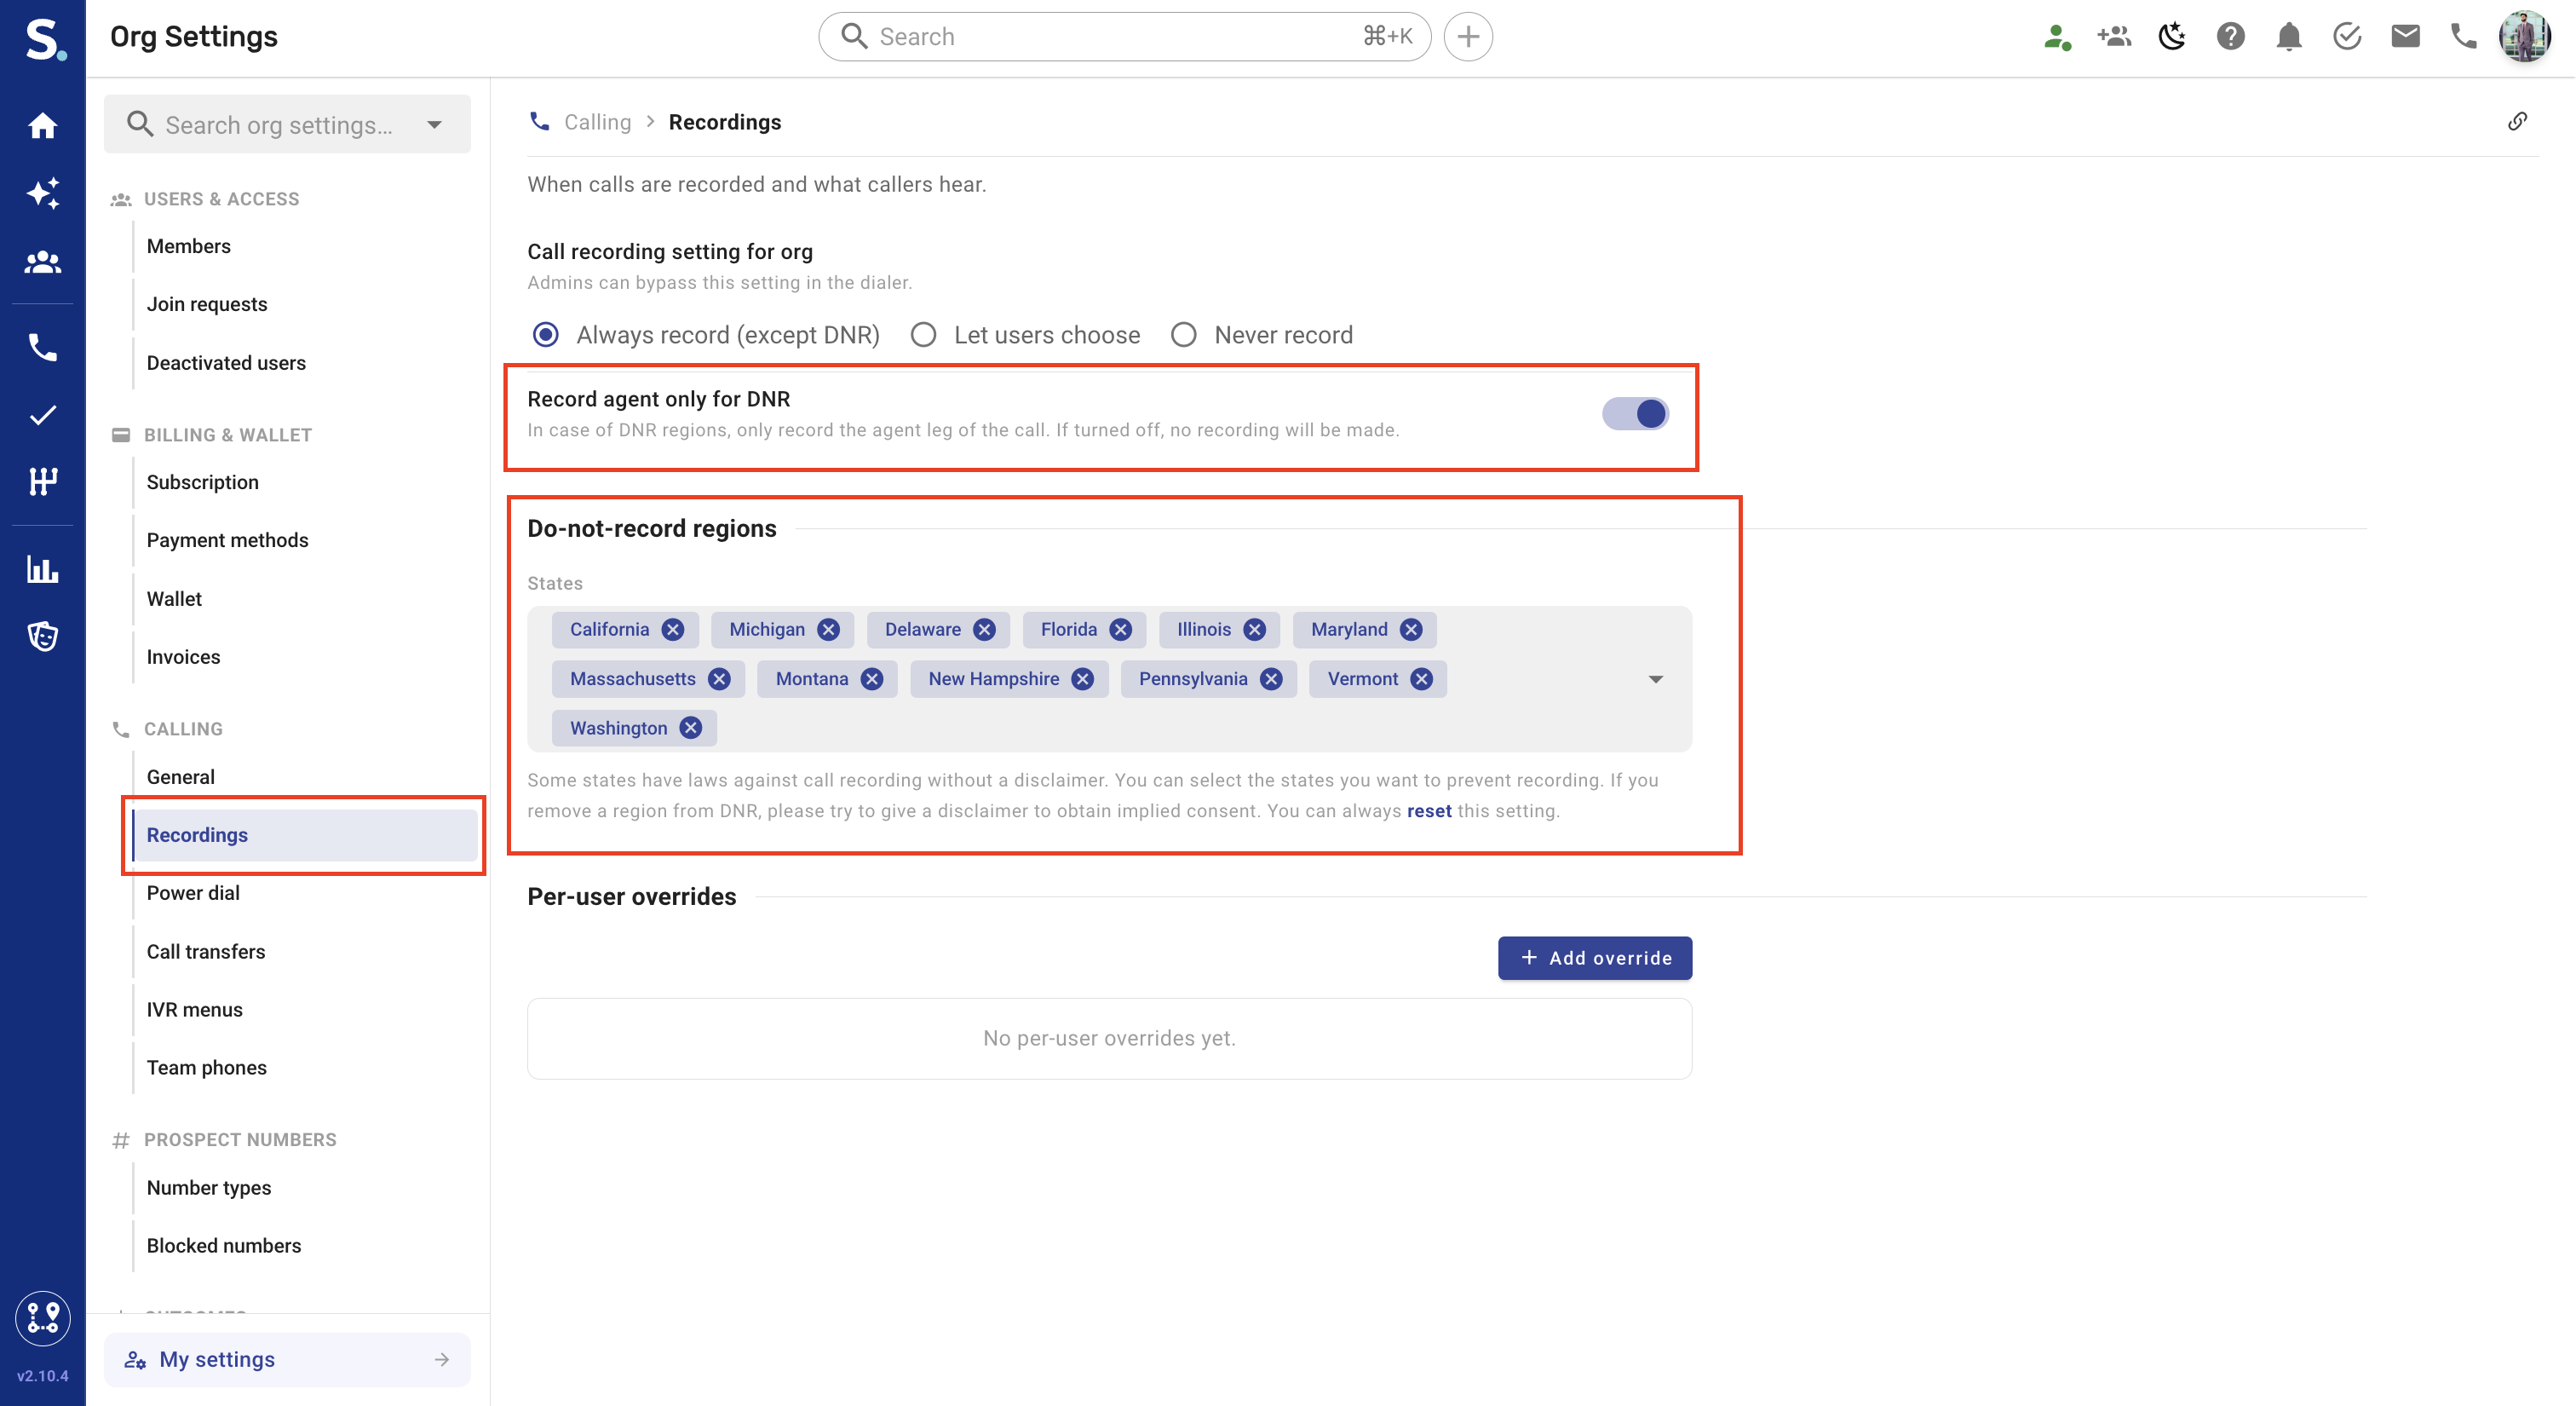
Turn on Record agent only for DNR (shown unless the org policy is Never record).
What it does:
Records only the agent’s side of the conversation in DNR regions — if turned off, no recording is made there
Maintains compliance with two-party consent laws
Enables AI features like call summaries and coaching insights — AI call note generation requires at least one recorded audio stream
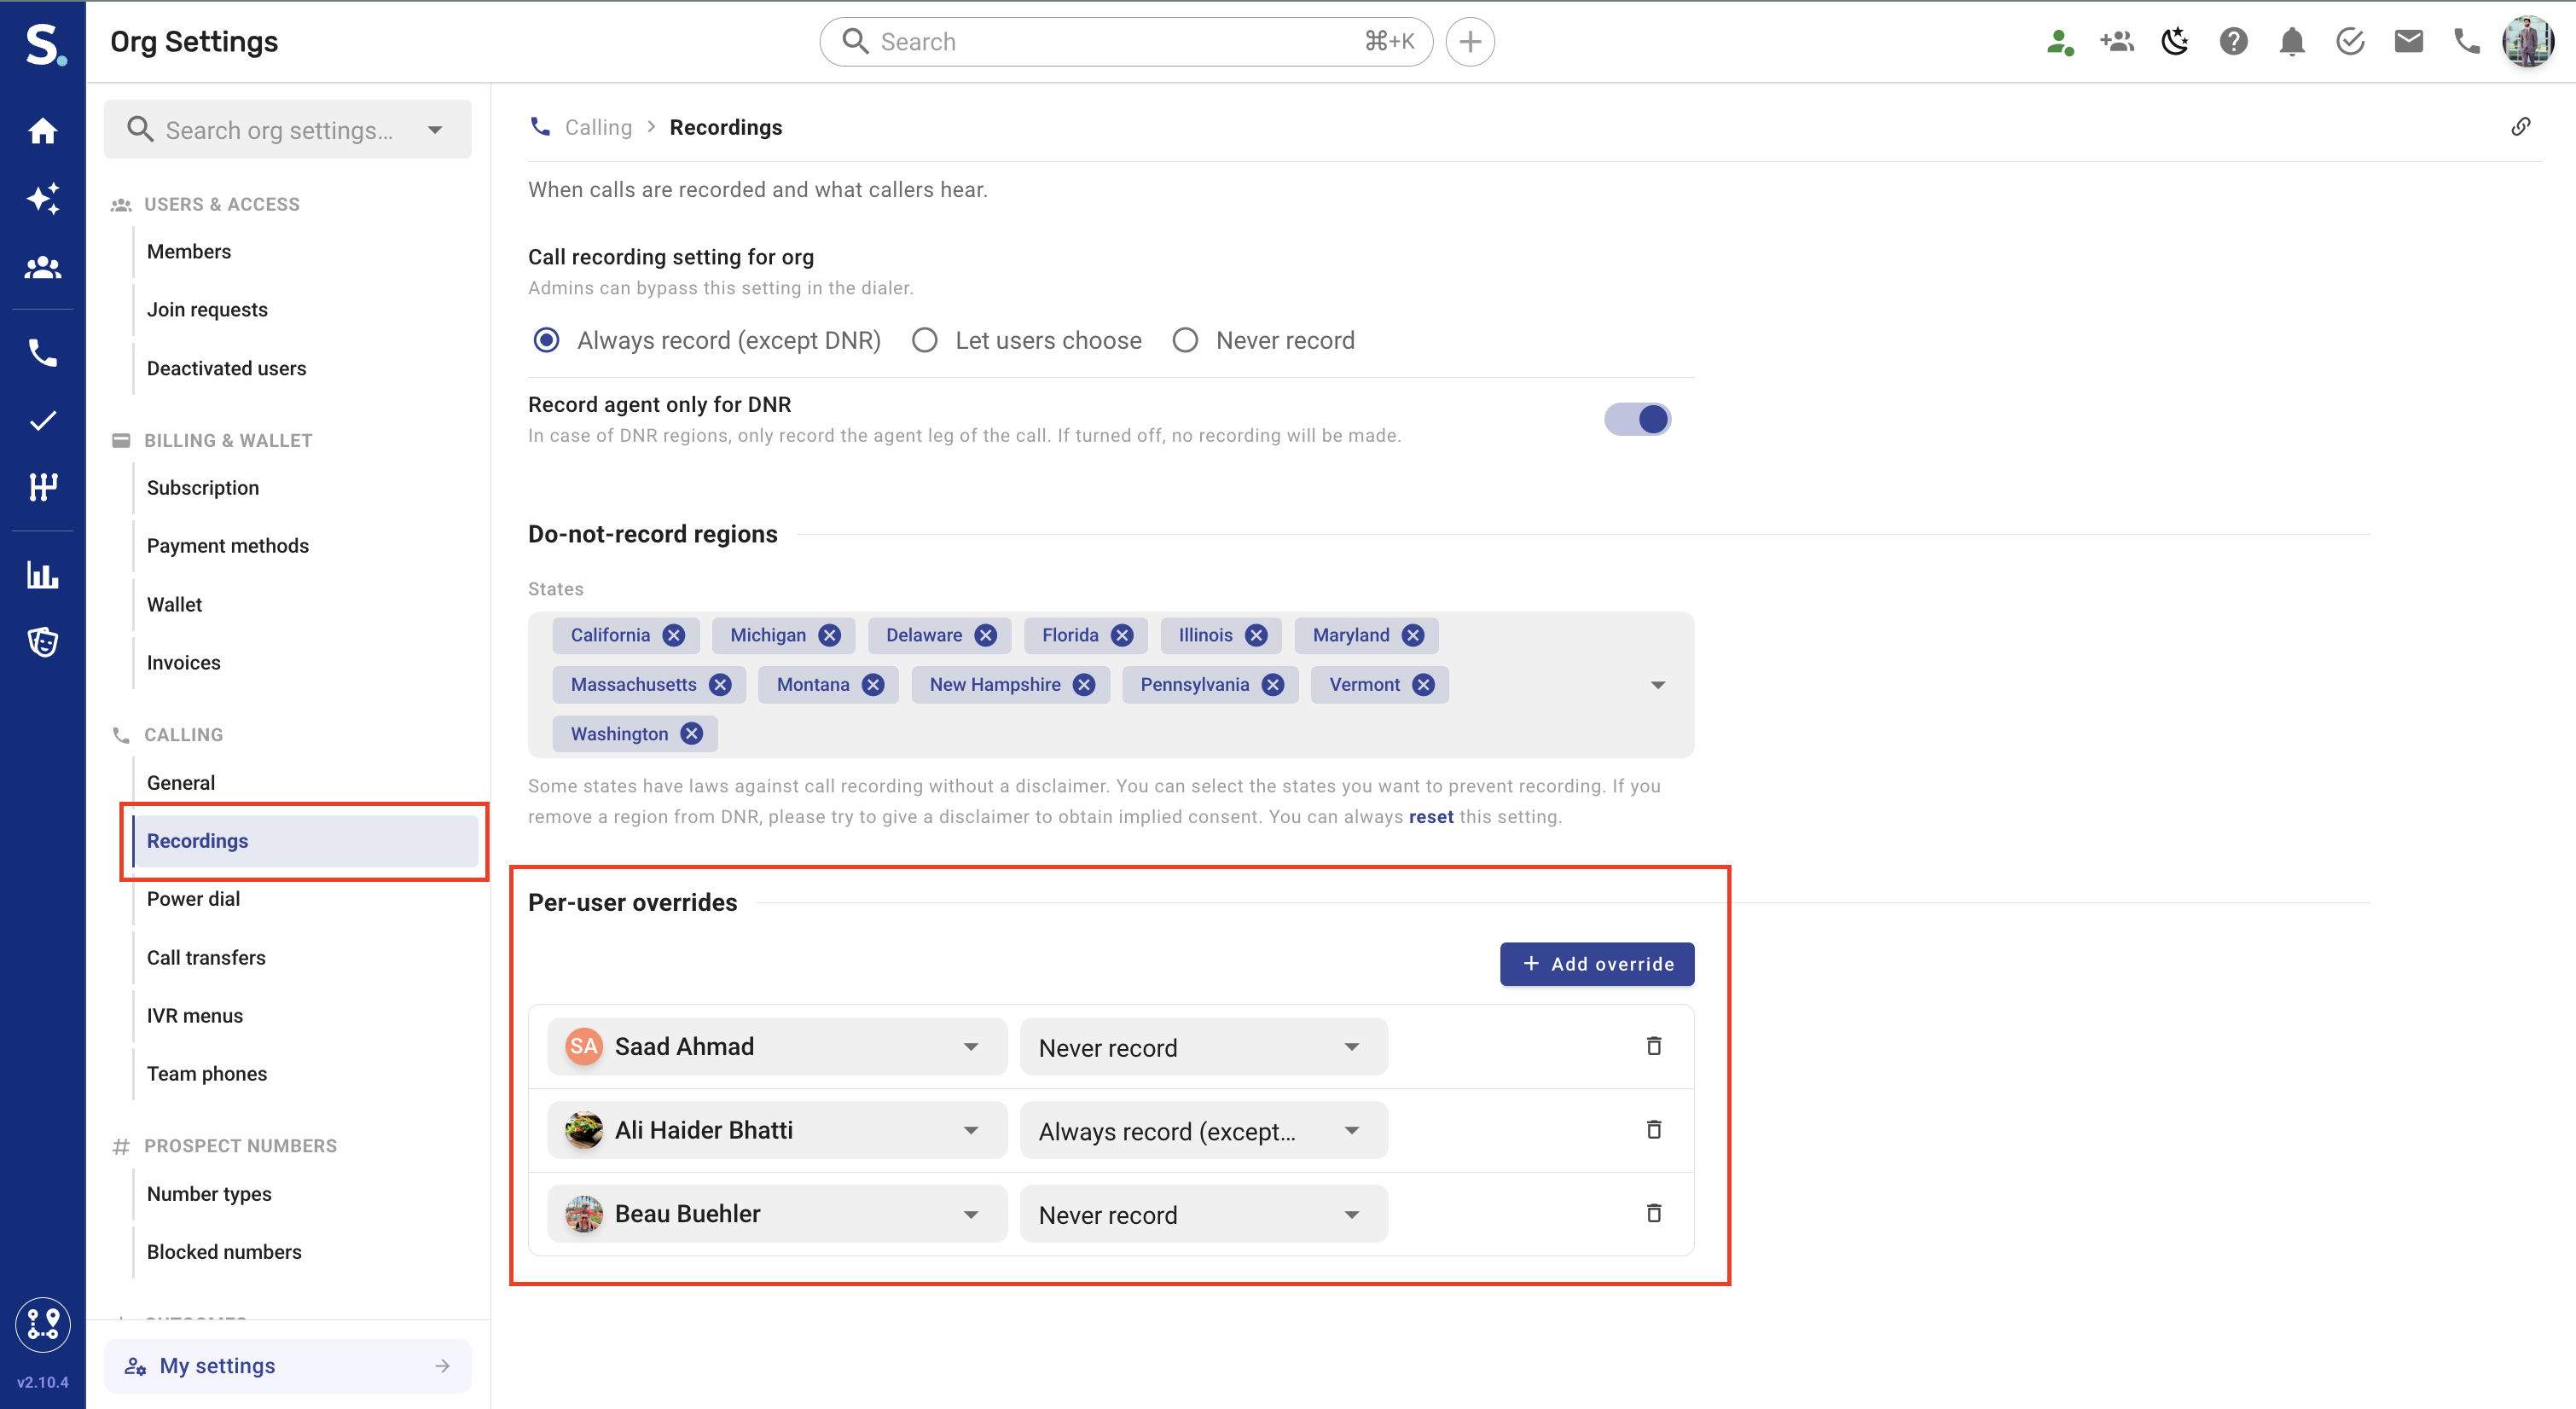
In special cases, administrators can apply user-specific recording rules that override the organization-wide setting. This allows you to enforce a default policy (such as Always record (except DNR)) while making exceptions for specific users
How to add an override:
On Calling → Recordings, find User overrides
Click Add override
Select a User from the dropdown
Choose the override behavior:
Allow user to toggle
Always record (except DNR)
Never record
Save the override
What this does:
The selected user follows the override instead of the org-wide setting
The override appears as a dedicated rule beneath the recording setting
Admins can add, change, or remove overrides at any time
Recommended setup pattern:
Set organization policy to Always record (except DNR)
Add overrides for specific users who should Never record or Allow user to toggle — ideal for executive calls or sensitive conversations without weakening compliance for the rest of the team
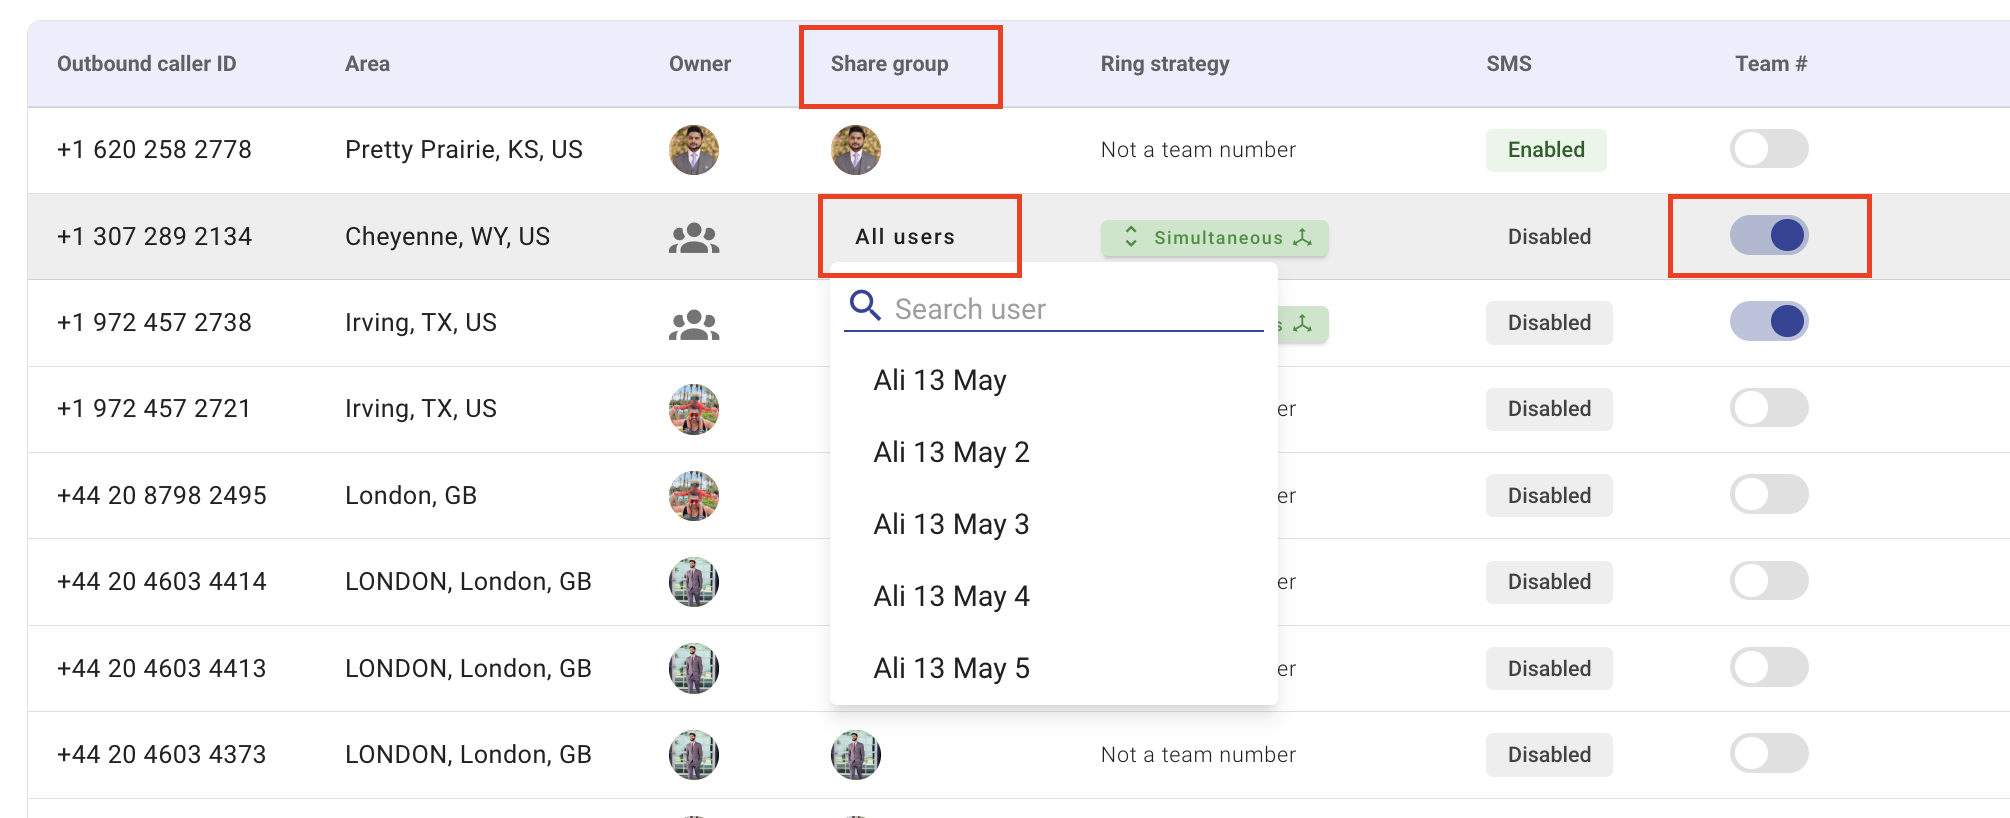
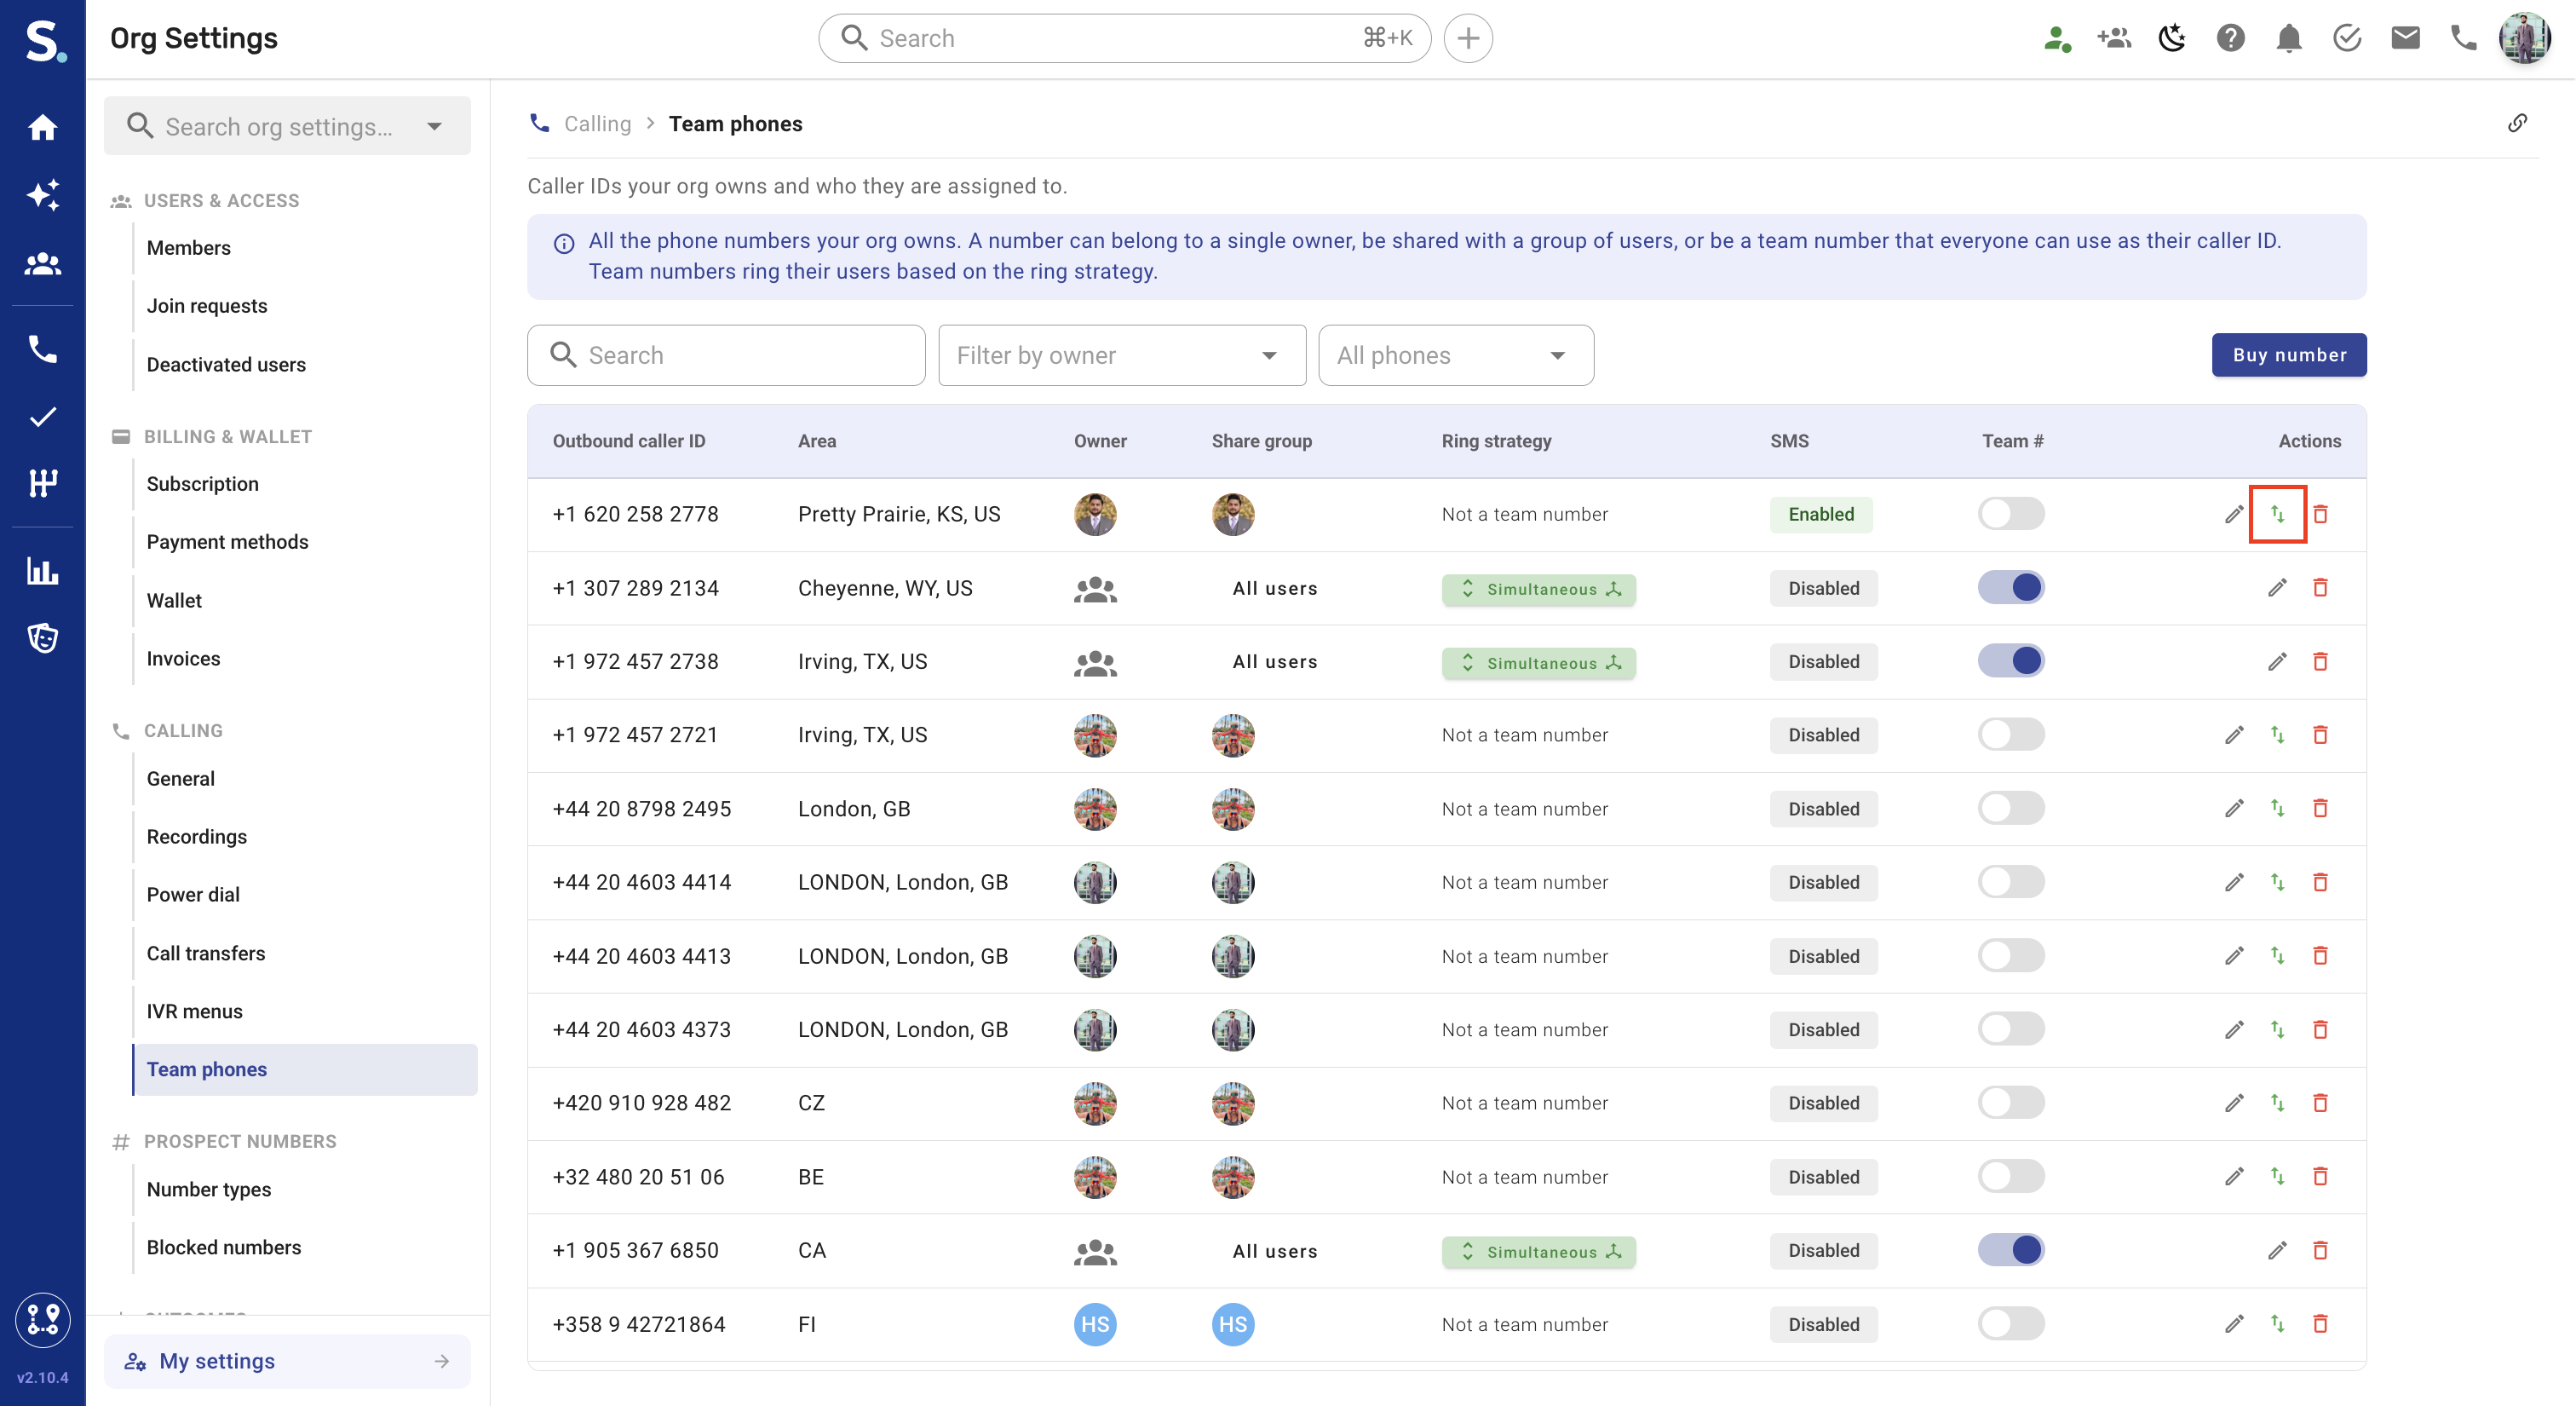
Administrators can centrally manage all phone numbers the org owns from Calling → Team phones. A number can belong to a single owner, be shared with a group of users, or be a team number that everyone can use as their caller ID
Use the toggle under the Team number column to enable or disable a number as a team phone number.
When enabled, the number becomes available to all users as an outbound caller ID, and rings its users based on the ring strategy
When disabled, the number is no longer shared and cannot be used as a team number
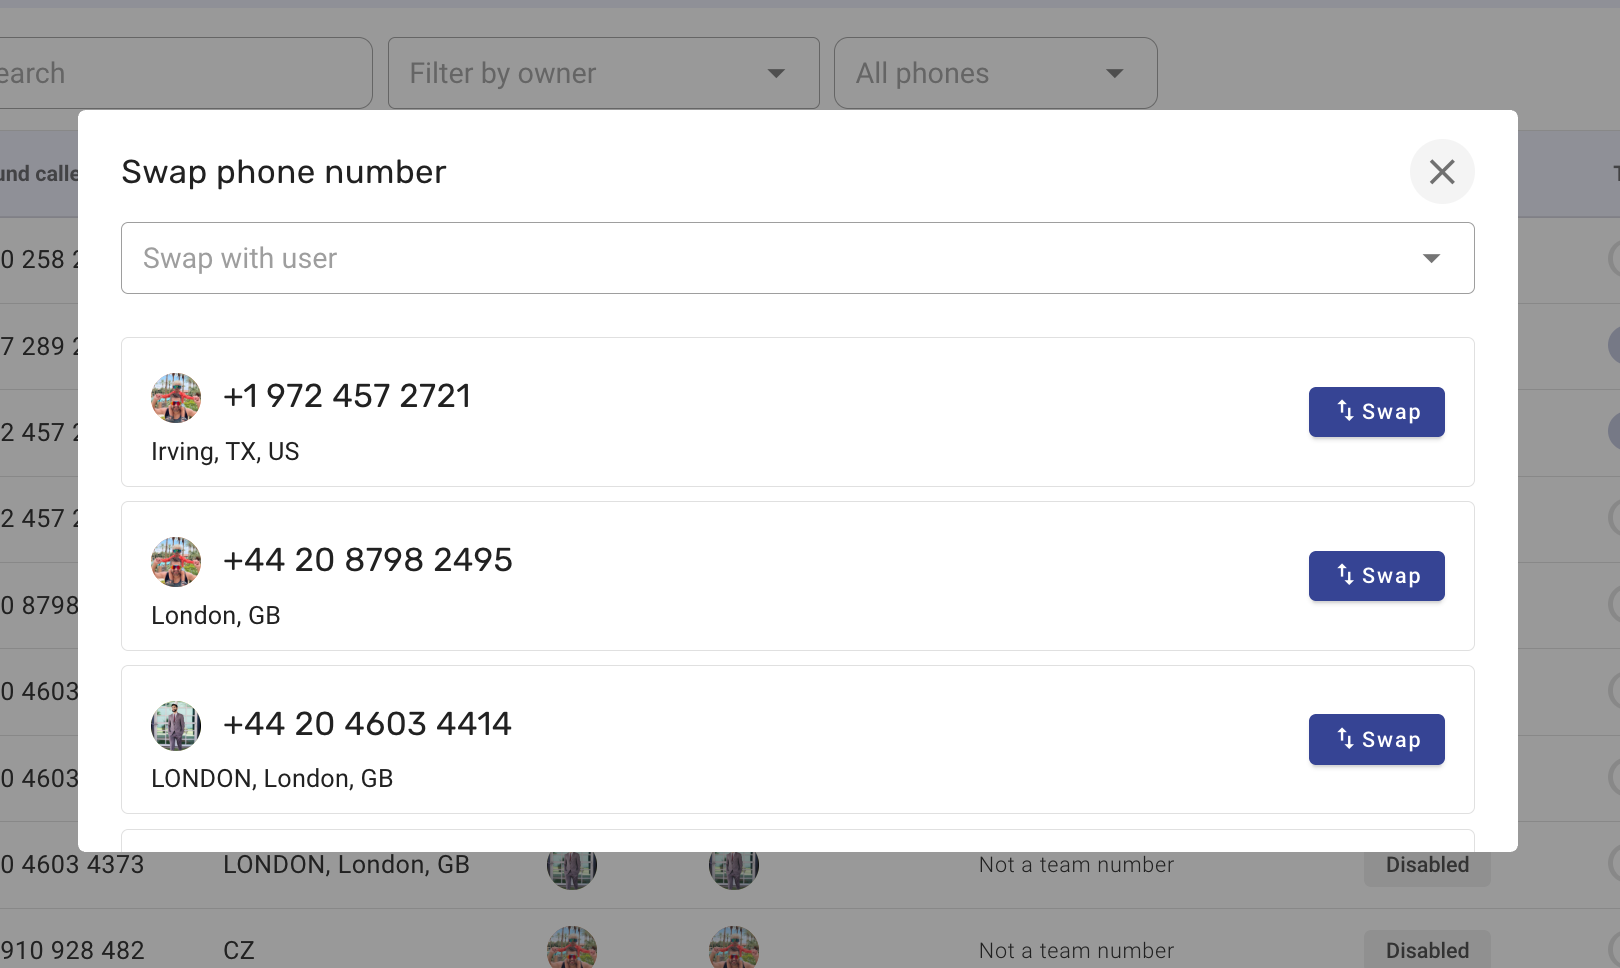
Click the swap icon under the Actions column to replace an existing number with a new one without disrupting your team’s dialing setup.
Useful when a number is flagged as spam, or you want to rotate numbers while preserving configuration
Click the trash (bin) icon under Actions to delete a number
Deleted phone numbers can be restored within 30 days
Best practice: Disable a number first if you are unsure, then delete once confirmed. Swap numbers instead of deleting when continuity matters
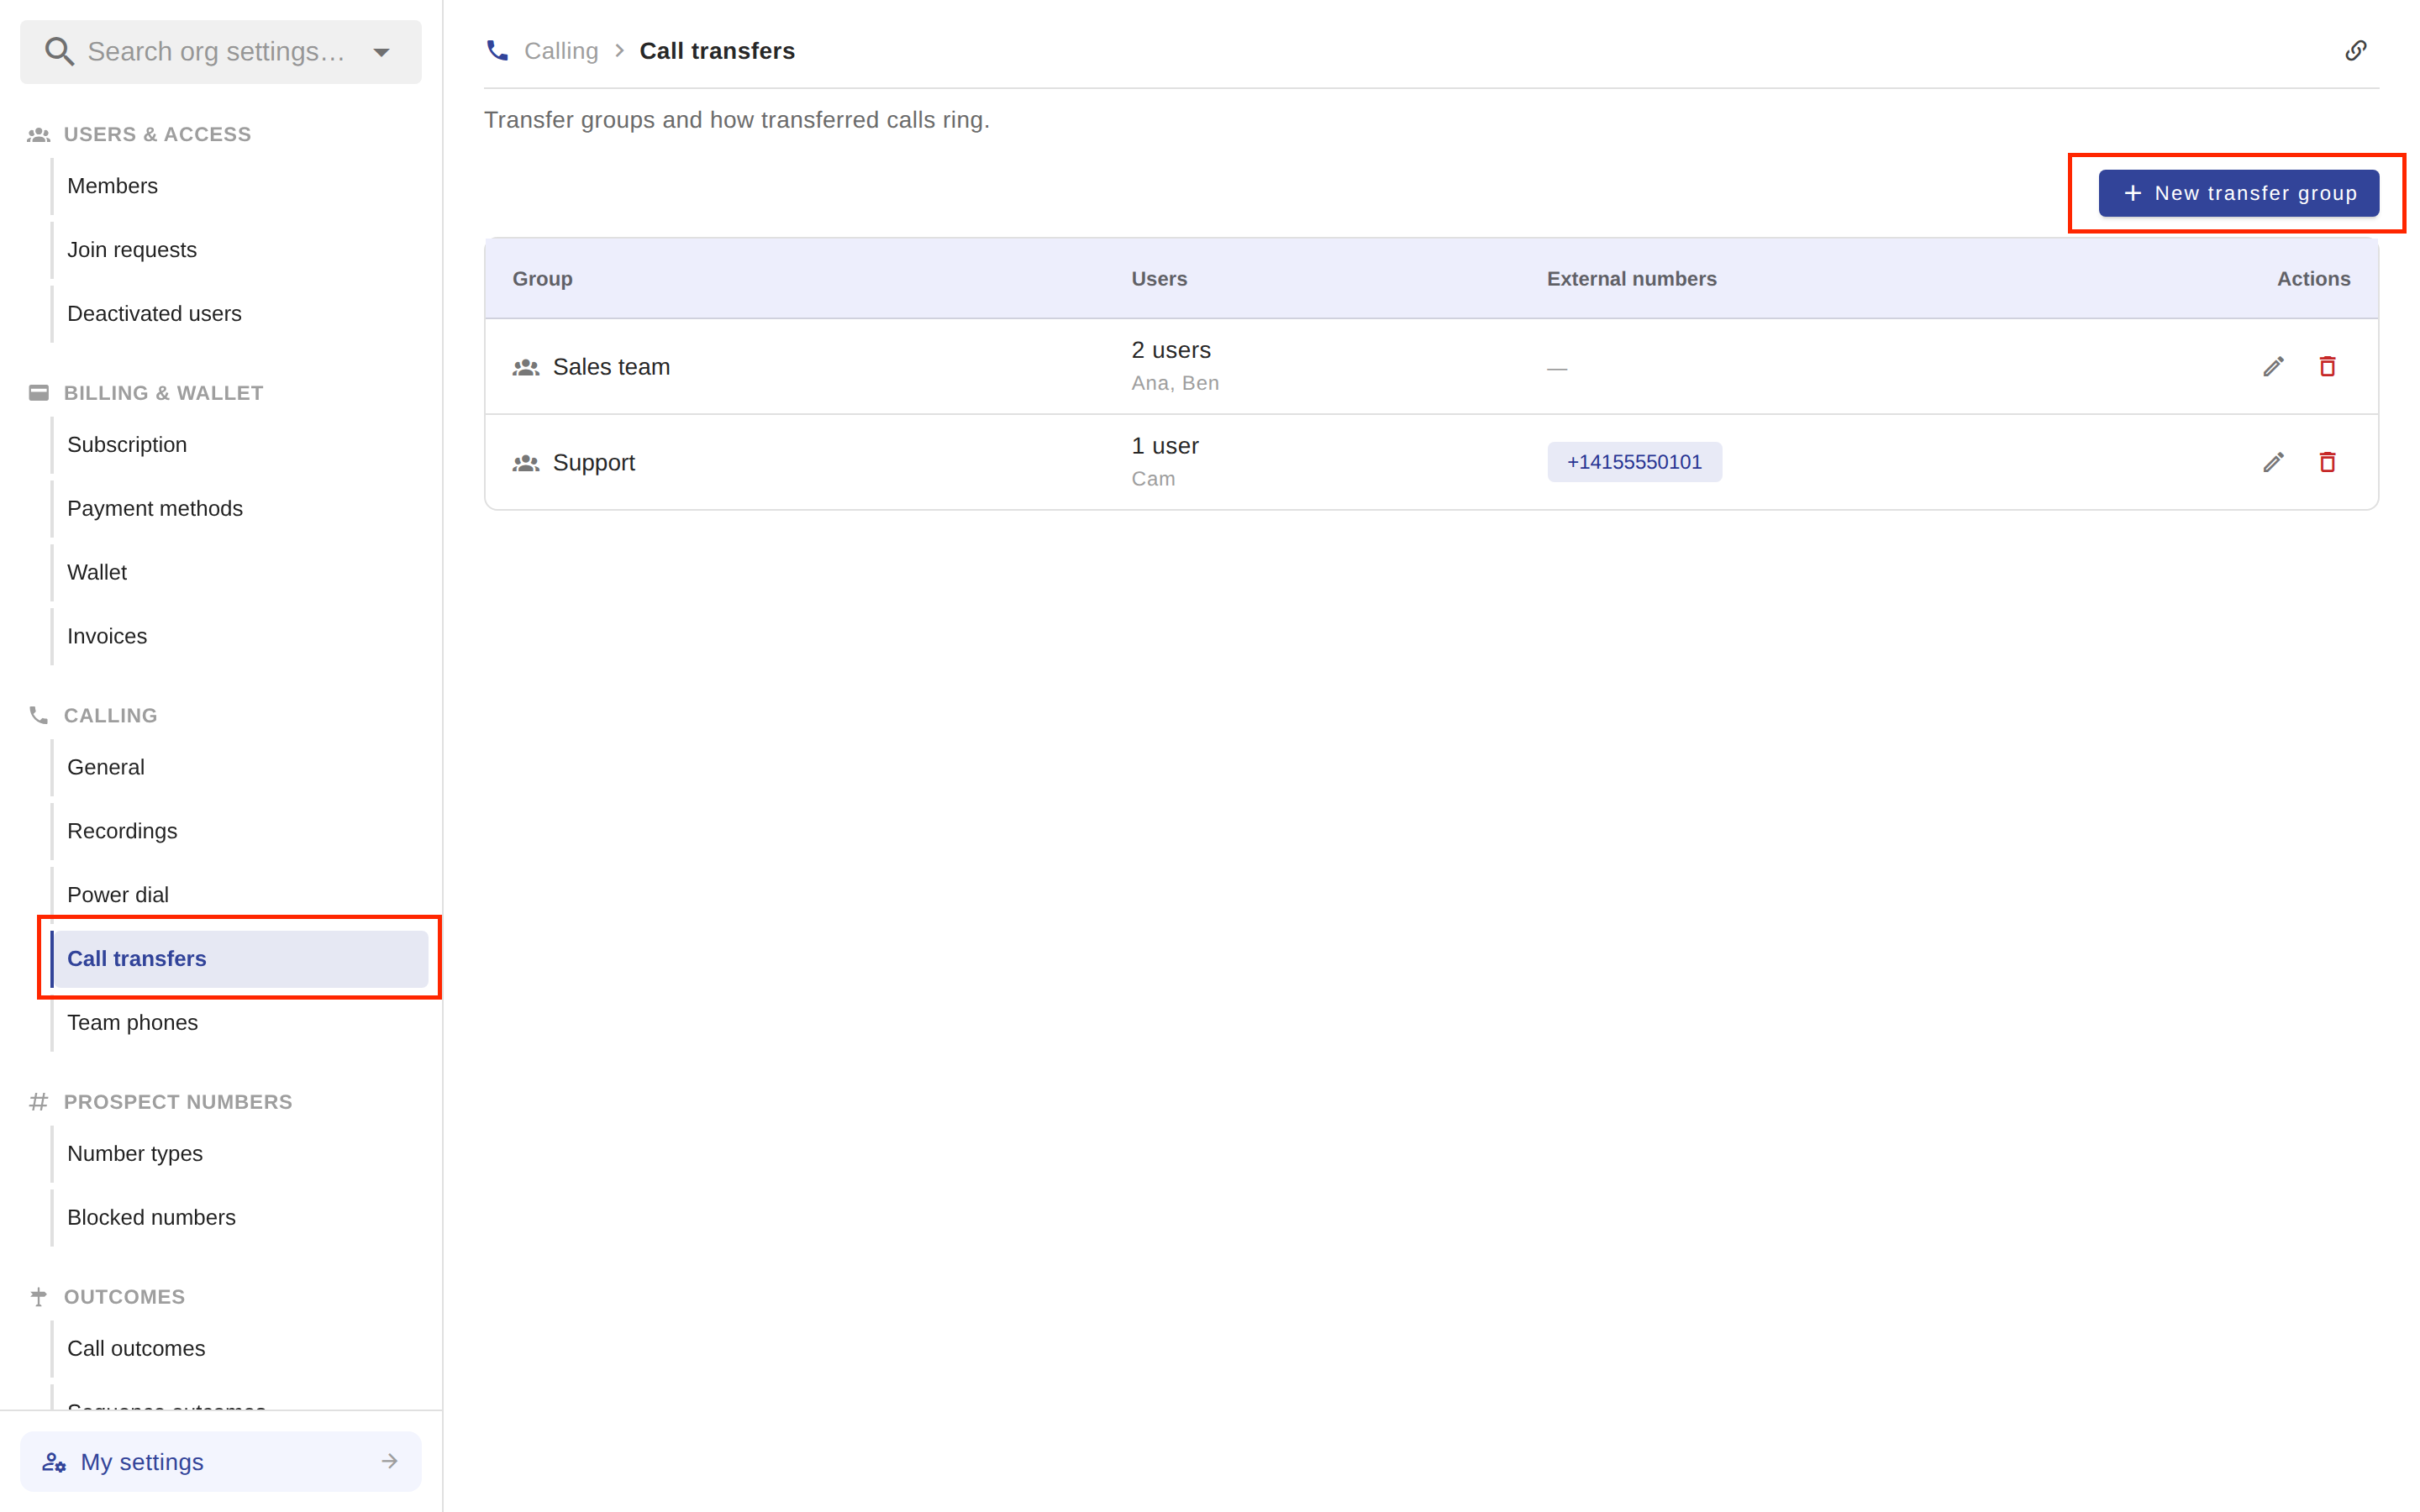
Call Transfer Groups let administrators define who live calls can be transferred to during an active conversation. A transfer group can include internal Symbo users, external phone numbers, or both, and all members ring at the same time
Go to Calling → Call transfers
Click New transfer group
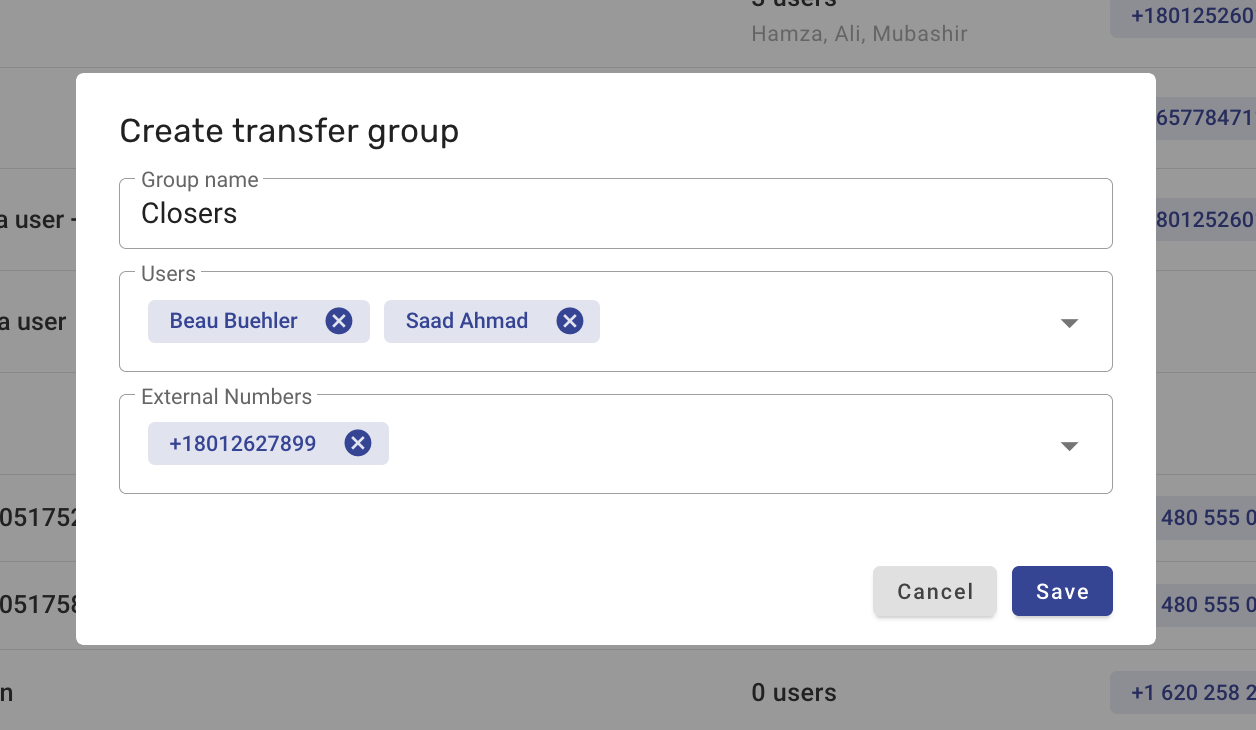
Enter a group name (e.g., IRA Department)
Add:
Users (internal Symbo users), and/or
External Numbers (formatted as +1XXXXXXXXXX)
Click Save
Edit or delete transfer groups at any time
Changes apply instantly across the organization
Enforcing global dialer settings allows administrators to:
Ensure legal and regulatory compliance
Improve answer rates with consistent local presence
Prevent misconfiguration by individual users
Standardize outbound calling behavior across teams
Enable AI features reliably through consistent recording policies
