(For Custom Sorting) Custom fields created via Org Settings > Custom Fields.
(For Company Sorting) Linked company data, either manually or via CRM sync.
Log in to your Symbo dashboard at app.symbo.ai/login.
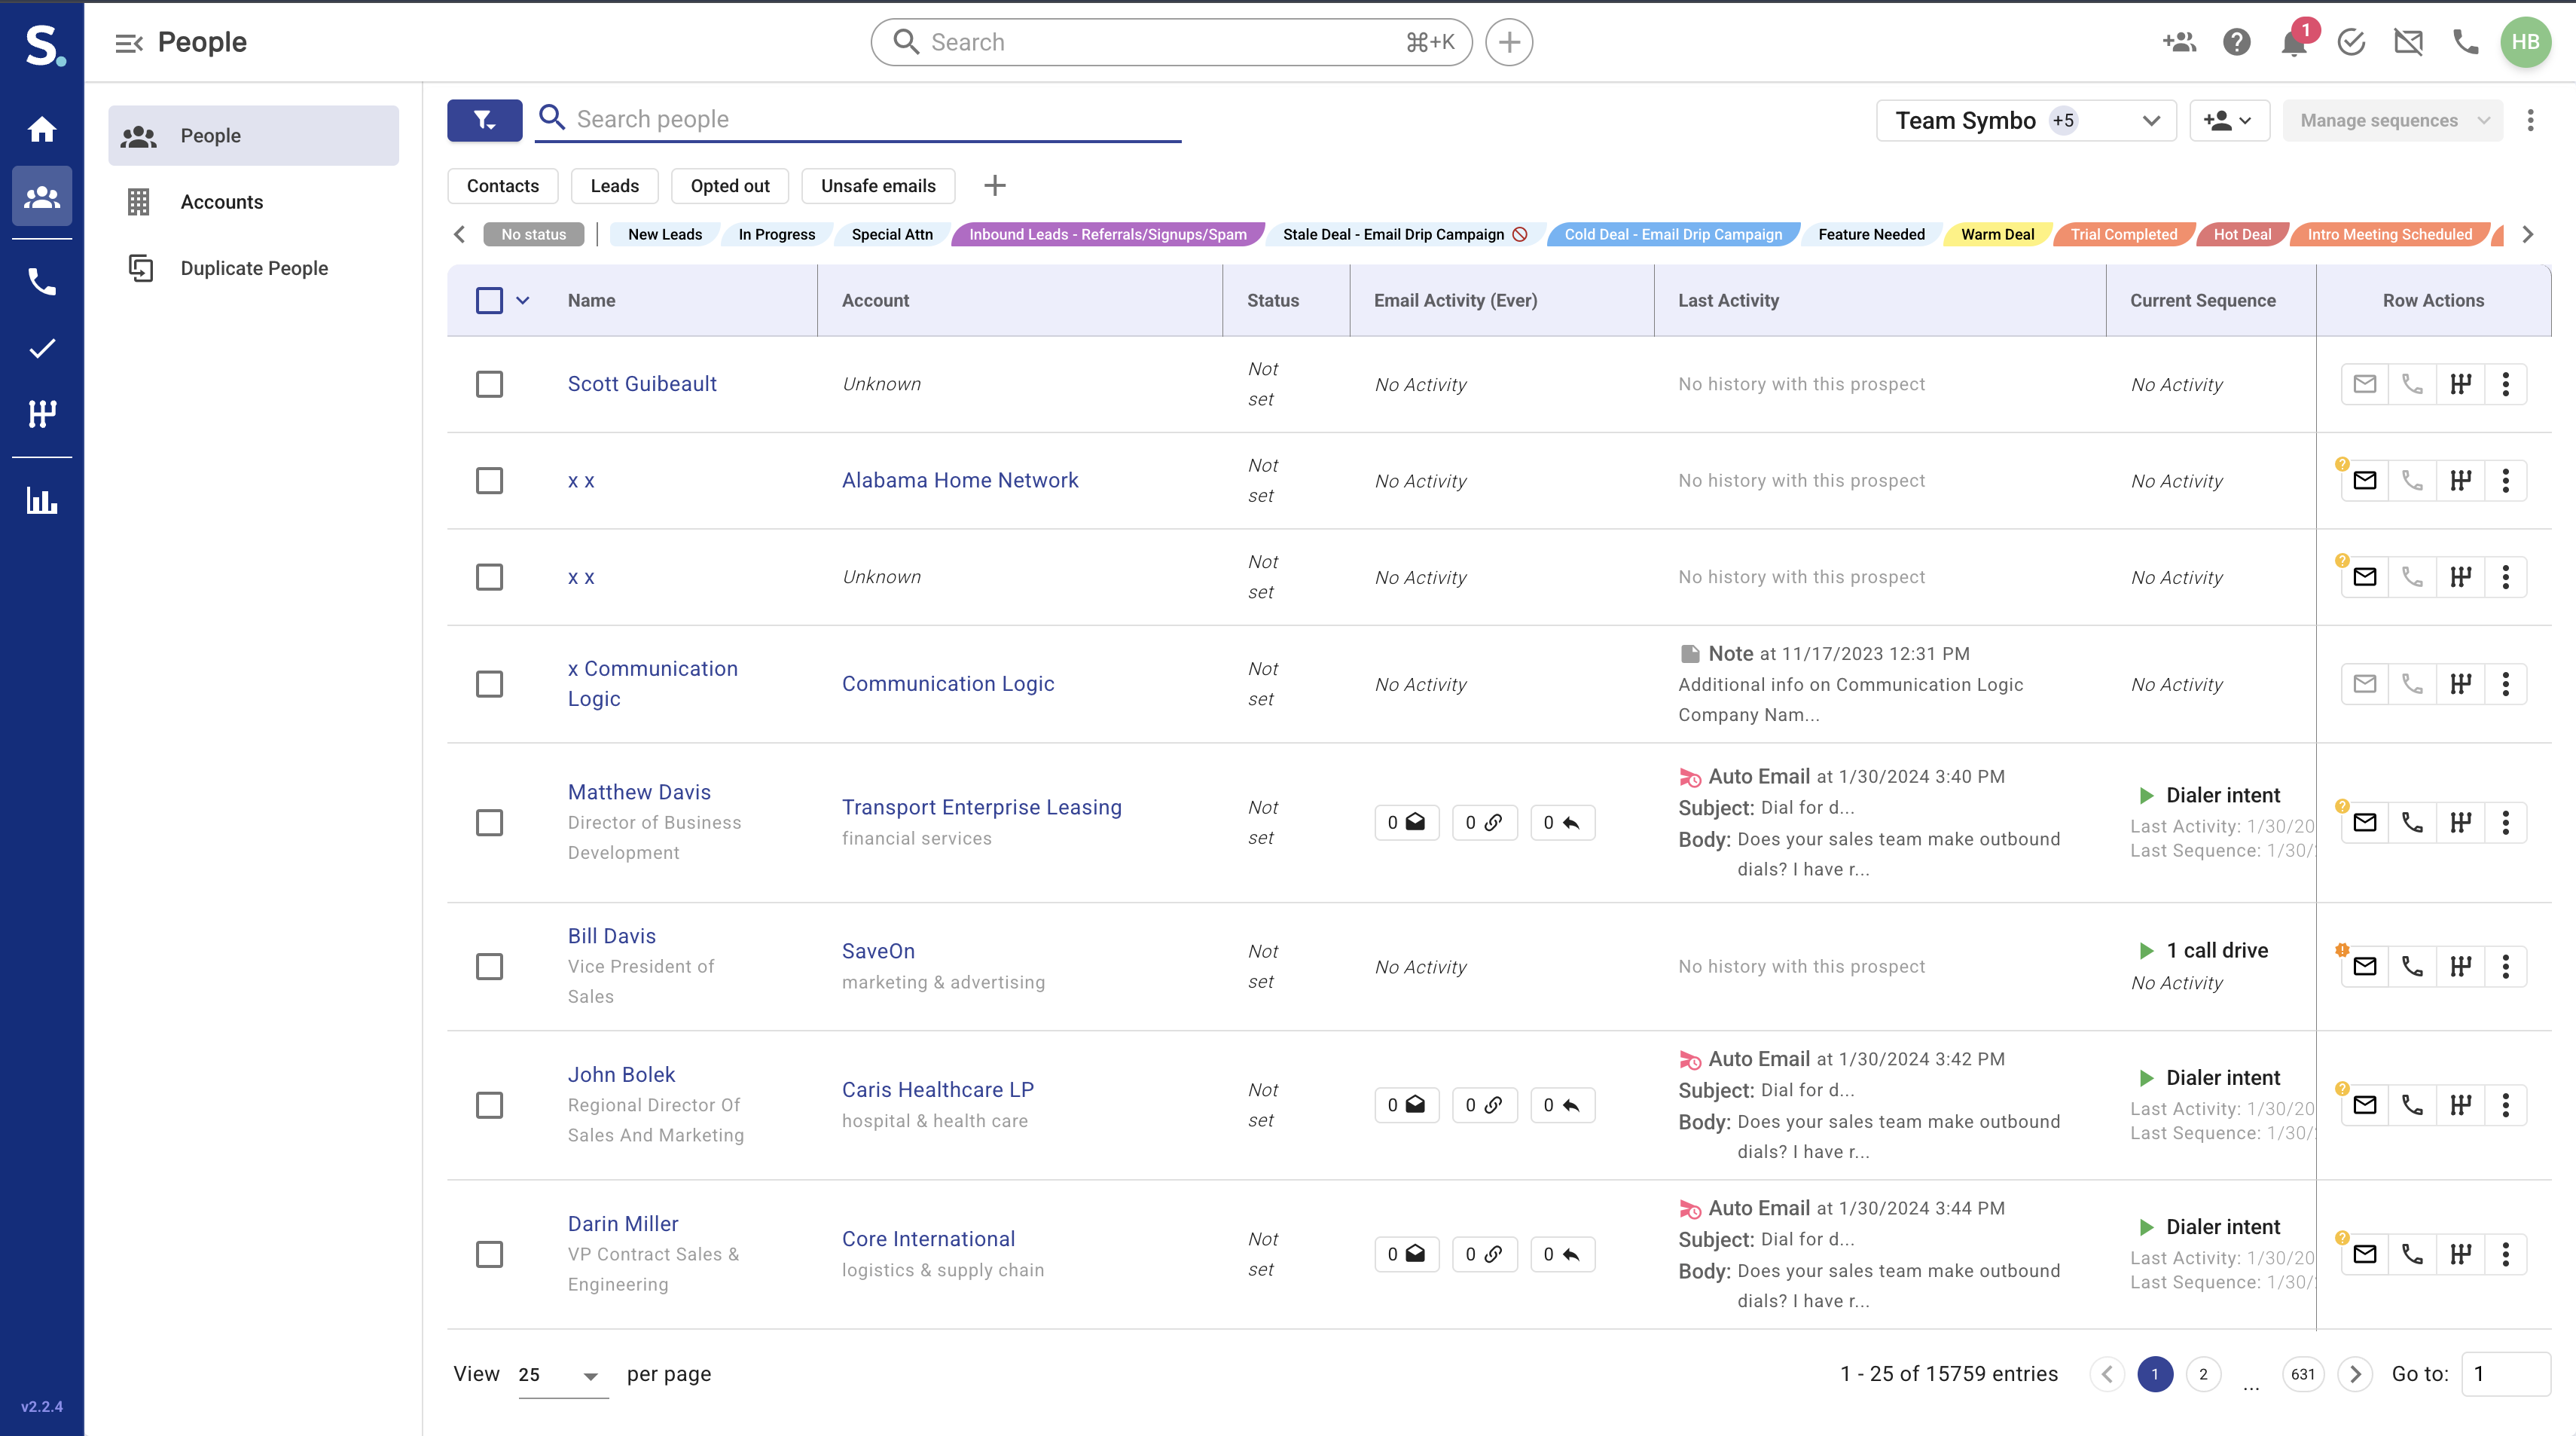
Navigate to the left-hand sidebar menu and click the People icon.
This will open the People Table, where all your leads and prospects are listed. Each row in the table represents a prospect/lead. You can see key details such as:
Name
Email Address
Phone Number
Tags
Other relevant information configured.
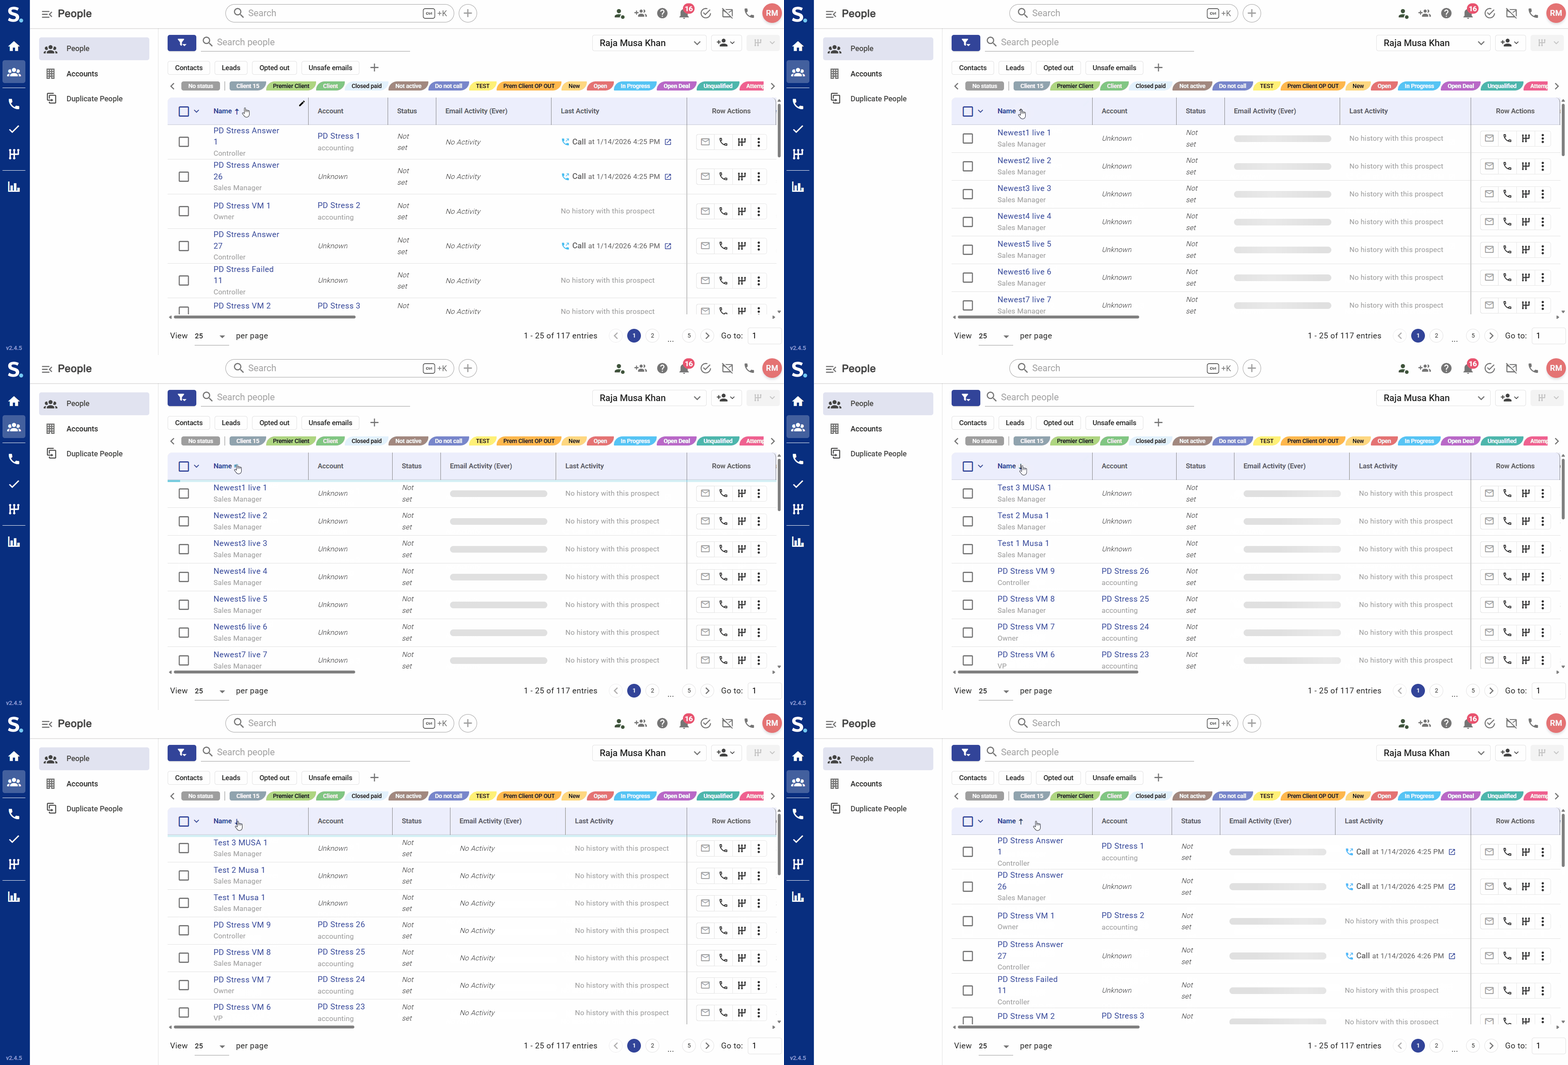
Locate the column headers at the top of the table (e.g., Name, Email, Last Activity).
Click once on a header to sort in ascending order (A–Z or low to high); an up arrow will appear.
Click again on the same header to toggle to descending order (Z–A or high to low).
Reset your view at any time by clicking a 3rd time on the same header or use the Clear Filters button next to the search bar to revert to the default name sort.
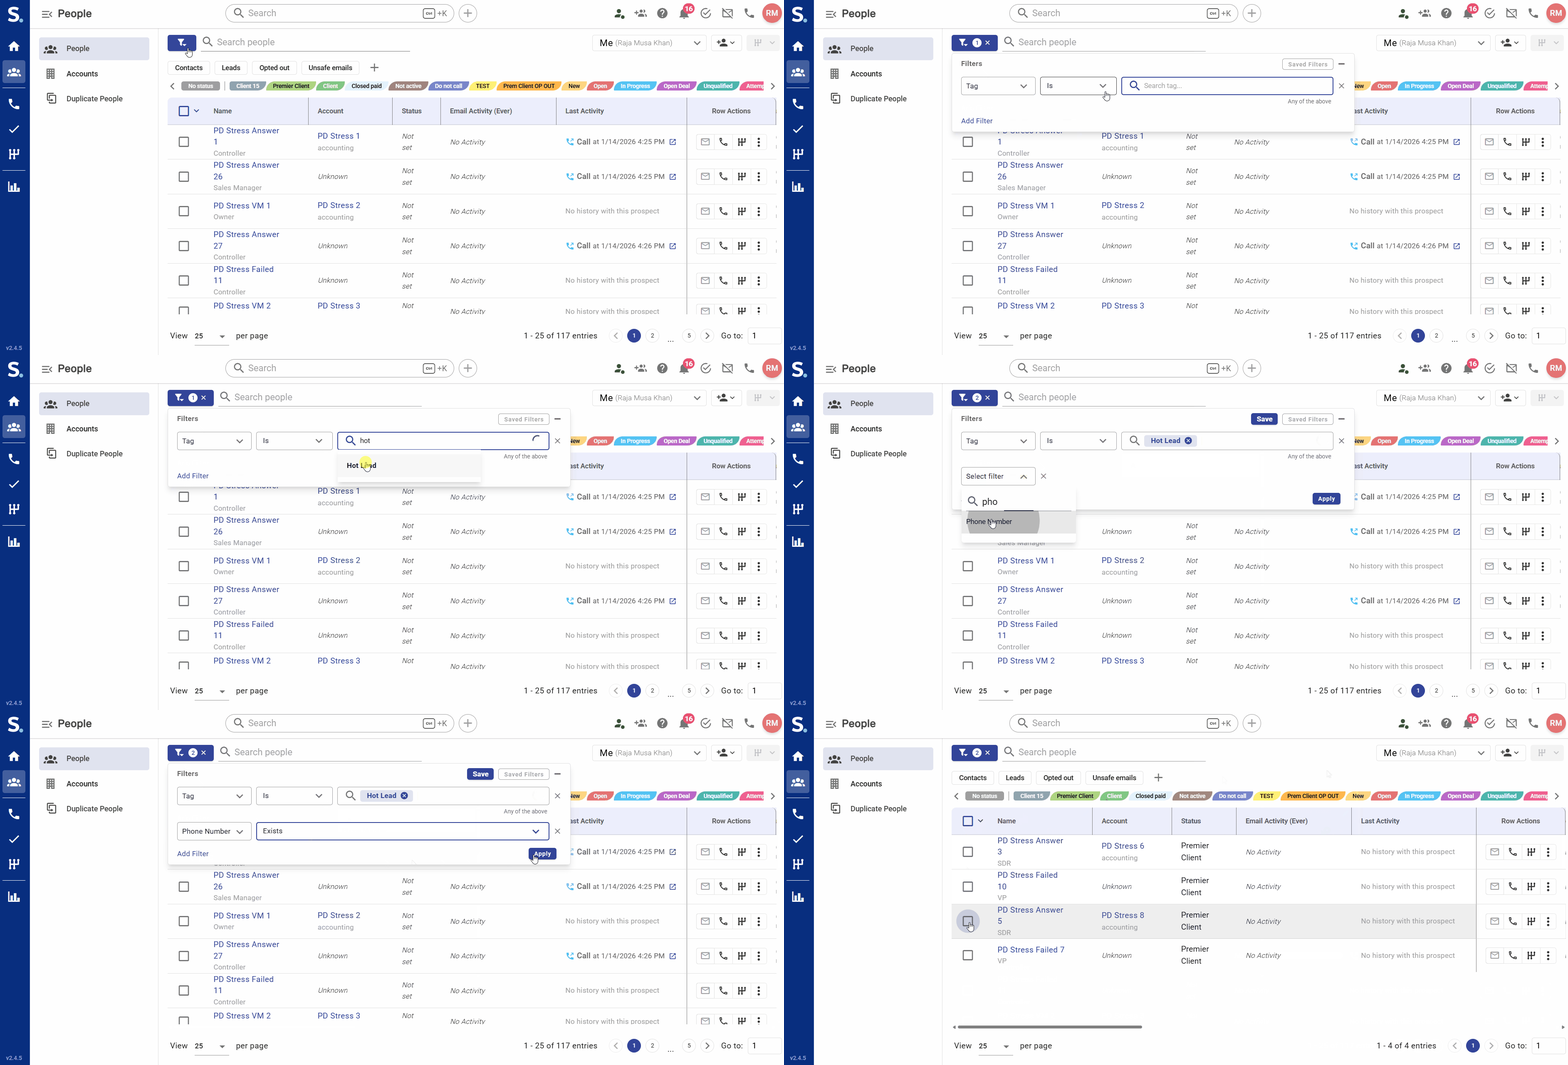
Identify the funnel (filter) icon in the top toolbar of the People table.
Select fields from the dropdown menu (Tags, Email, Phone Number, Other Custom Fields). You can use multiple fields to narrow down your records.
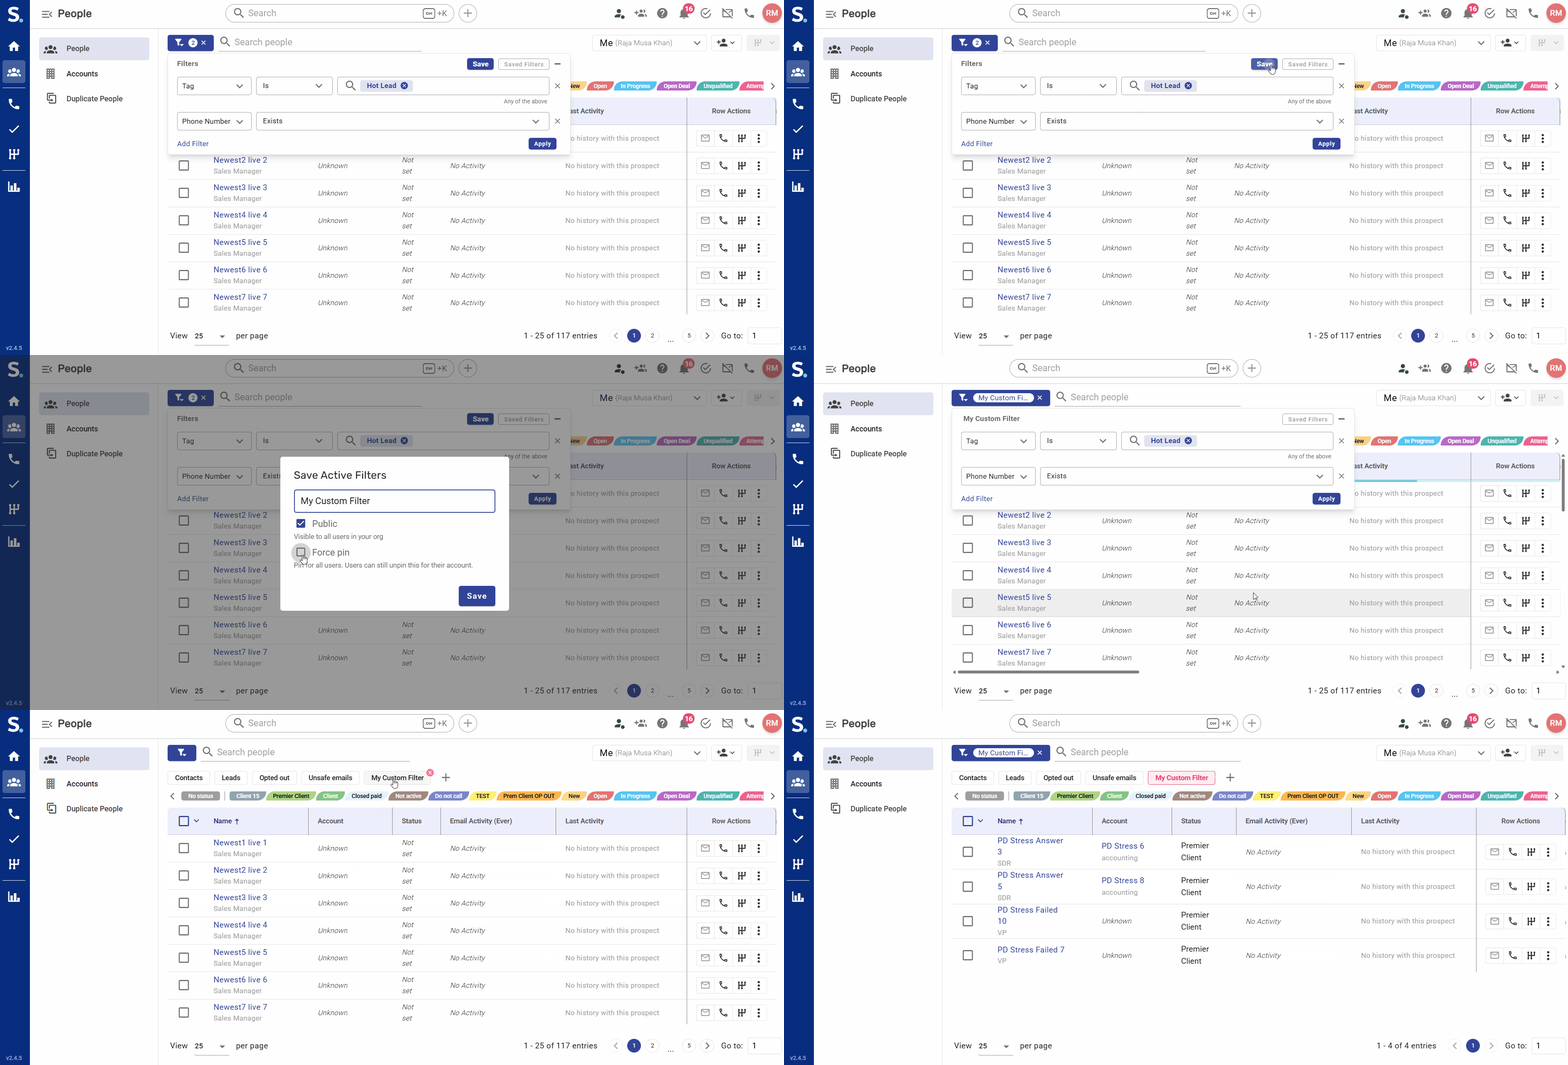
Define the criteria (e.g., Tag = Hot Lead, Phone Number= Exists) and click Apply to refresh the list instantly.
Add multiple conditions by clicking the + icon within the filter menu to create complex segments like "High Revenue + No Recent Activity".
Toggle visibility of specific columns (like Account or Status) using the Column Selector pencil icon at the top-right.
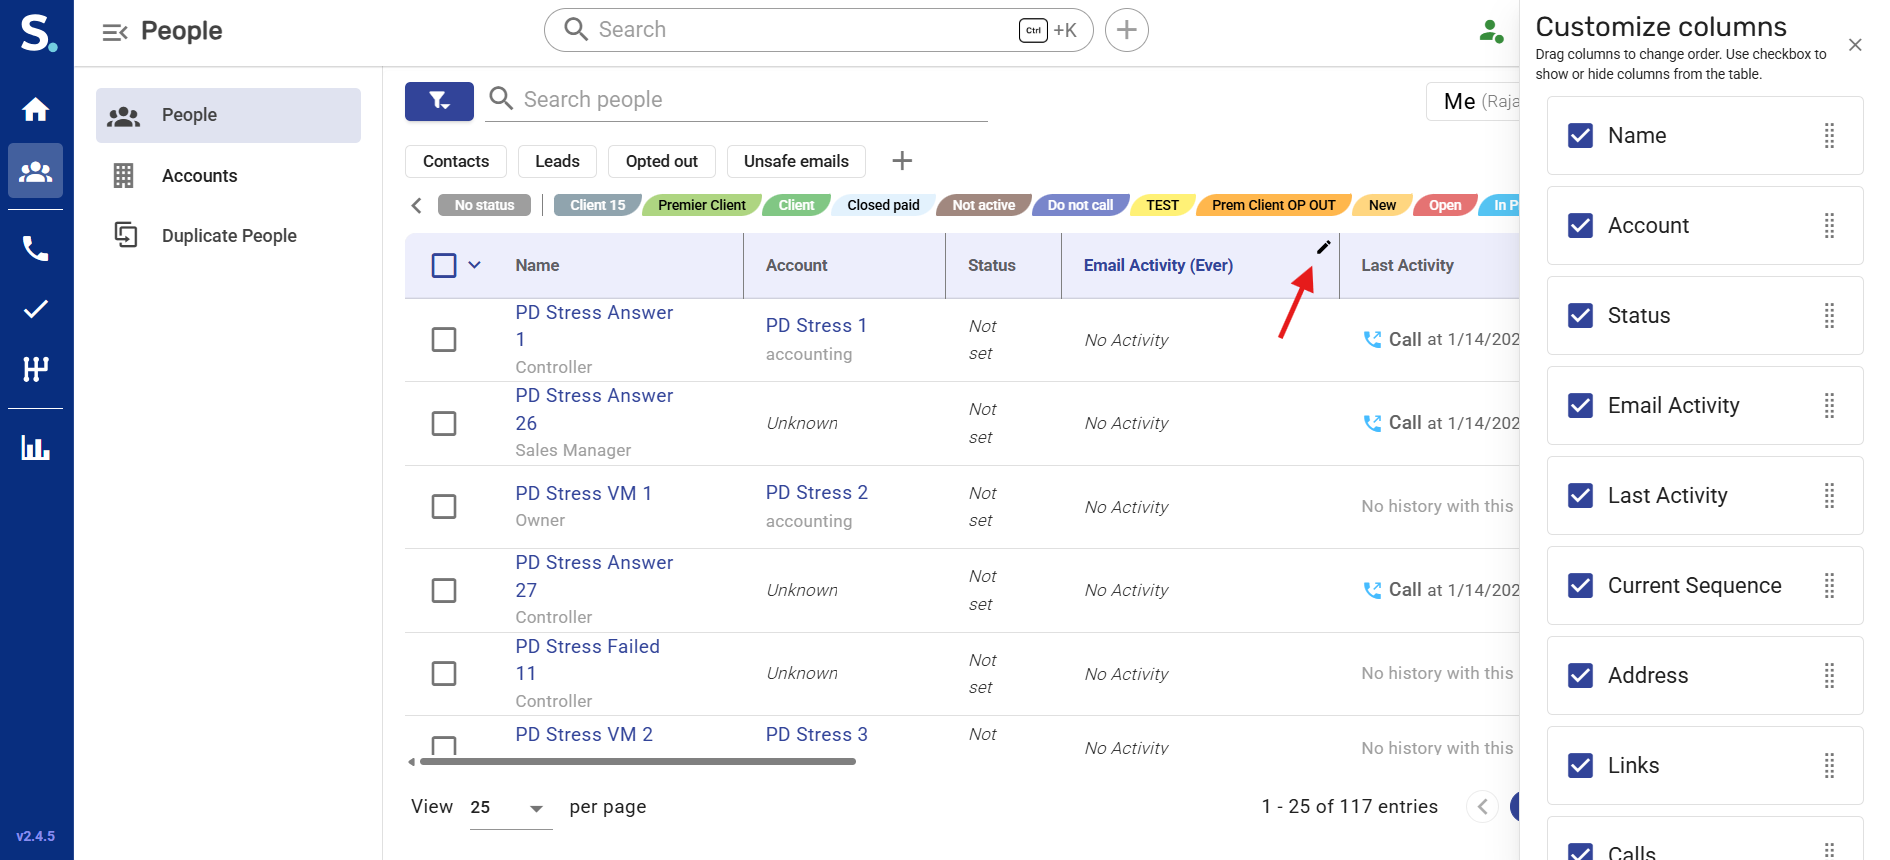
Sort by custom field by clicking the header of any text, number, or select-type custom property.
Group by account by clicking the Company header to view all prospects associated with a specific organization.
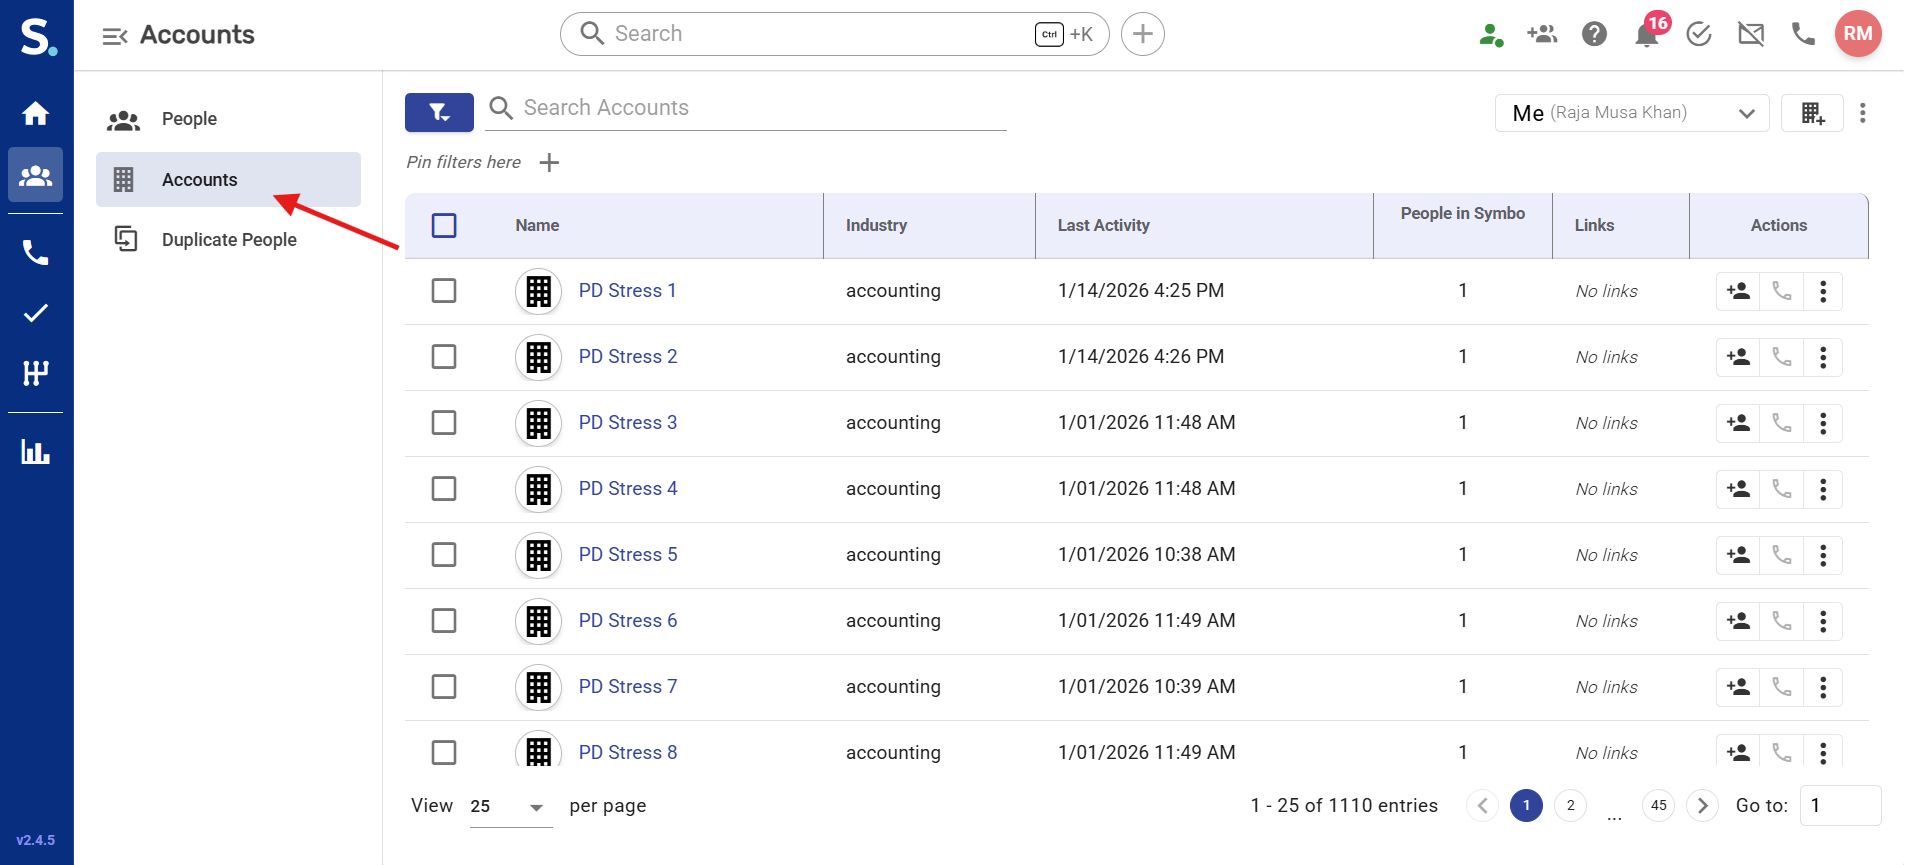
Review your filtered and sorted list to ensure it reflects the exact segment you need to dial.
Click "Save View" in the top-right corner to name your list (e.g., "Today's High-Priority Leads").
Access your saved segments later via the Views drop-down to skip the manual setup and start your sessions immediately.